


Postman 的中高级用法能够大幅提升 API 开发与测试效率,尤其适合复杂场景(如自动化测试、动态数据处理等)。
本文测试使用的Python后端代码:
from fastapi import FastAPI, Header, HTTPException
from pydantic import BaseModel
from datetime import datetime
import uuid

app = FastAPI()

# 模拟数据库存储的令牌(实际应用中会验证用户身份)
valid_tokens = set()


# 登录请求体模型
class LoginRequest(BaseModel):
    username: str
    password: str


# 登录接口 - 用于获取令牌
@app.post("/login")
async def login(credentials: LoginRequest):
    # 简单验证(实际应用中会检查数据库)
    if credentials.username and credentials.password:
        # 生成随机令牌
        token = str(uuid.uuid4())
        valid_tokens.add(token)
        return {
            "status": "success",
            "data": {
                "token": token,
                "expires_at": datetime.now().isoformat()
            }
        }
    raise HTTPException(status_code=401, detail="无效的用户名或密码")


# 需要令牌验证的数据接口
@app.get("/protected-data")
async def get_protected_data(authorization: str = Header(None)):
    if not authorization or not authorization.startswith("Bearer "):
        raise HTTPException(status_code=401, detail="未提供有效的授权令牌")

    token = authorization.split(" ")[1]
    if token not in valid_tokens:
        raise HTTPException(status_code=401, detail="令牌无效或已过期")

    return {
        "status": "success",
        "data": {
            "message": "这是受保护的数据",
            "timestamp": datetime.now().timestamp(),
            "random_value": uuid.uuid4().hex
        }
    }


# 接受时间戳参数的接口(用于测试动态参数)
@app.get("/time-sensitive-data")
async def get_time_sensitive_data(ts: float):
    current_time = datetime.now().timestamp()
    time_diff = current_time - ts

    return {
        "status": "success",
        "data": {
            "request_timestamp": ts,
            "server_time": current_time,
            "time_difference": f"{time_diff:.2f}秒",
            "message": "时间敏感数据响应"
        }
    }


if __name__ == "__main__":
    import uvicorn

    uvicorn.run(app, host="0.0.0.0", port=8000)
代码对应的接口文档:
openapi: 3.0.0
info:
  title: FastAPI 示例接口
  description: 包含登录、受保护数据和时间敏感数据的API接口
  version: 1.0.0
servers:
  - url: http://localhost:8000
    description: 本地开发服务器
paths:
  /login:
    post:
      summary: 用户登录并获取令牌
      description: 验证用户凭据并返回访问令牌
      requestBody:
        required: true
        content:
          application/json:
            schema:
              type: object
              required:
                - username
                - password
              properties:
                username:
                  type: string
                  description: 用户名
                password:
                  type: string
                  description: 密码
      responses:
        '200':
          description: 登录成功,返回令牌
          content:
            application/json:
              schema:
                type: object
                properties:
                  status:
                    type: string
                    example: success
                  data:
                    type: object
                    properties:
                      token:
                        type: string
                        format: uuid
                        description: 访问令牌
                      expires_at:
                        type: string
                        format: date-time
                        description: 令牌过期时间
        '401':
          description: 无效的用户名或密码
          content:
            application/json:
              schema:
                type: object
                properties:
                  detail:
                    type: string
                    example: 无效的用户名或密码

  /protected-data:
    get:
      summary: 获取受保护的数据
      description: 需要有效的Bearer令牌才能访问
      parameters:
        - name: Authorization
          in: header
          required: true
          schema:
            type: string
            example: Bearer <token>
          description: 格式为 "Bearer {token}" 的授权头
      responses:
        '200':
          description: 成功获取受保护数据
          content:
            application/json:
              schema:
                type: object
                properties:
                  status:
                    type: string
                    example: success
                  data:
                    type: object
                    properties:
                      message:
                        type: string
                        example: 这是受保护的数据
                      timestamp:
                        type: number
                        format: float
                        description: 服务器响应时间戳
                      random_value:
                        type: string
                        description: 随机生成的值
        '401':
          description: 未授权访问
          content:
            application/json:
              schema:
                type: object
                properties:
                  detail:
                    type: string
                    examples:
                      no_token:
                        value: 未提供有效的授权令牌
                      invalid_token:
                        value: 令牌无效或已过期

  /time-sensitive-data:
    get:
      summary: 获取时间敏感数据
      description: 根据提供的时间戳返回时间相关数据
      parameters:
        - name: ts
          in: query
          required: true
          schema:
            type: number
            format: float
          description: 客户端请求的时间戳
      responses:
        '200':
          description: 成功返回时间敏感数据
          content:
            application/json:
              schema:
                type: object
                properties:
                  status:
                    type: string
                    example: success
                  data:
                    type: object
                    properties:
                      request_timestamp:
                        type: number
                        format: float
                        description: 客户端提供的时间戳
                      server_time:
                        type: number
                        format: float
                        description: 服务器处理请求的时间戳
                      time_difference:
                        type: string
                        description: 客户端与服务器时间差
                        example: 0.50秒
                      message:
                        type: string
                        example: 时间敏感数据响应
一、动态数据与请求关联(Pre-request Script)
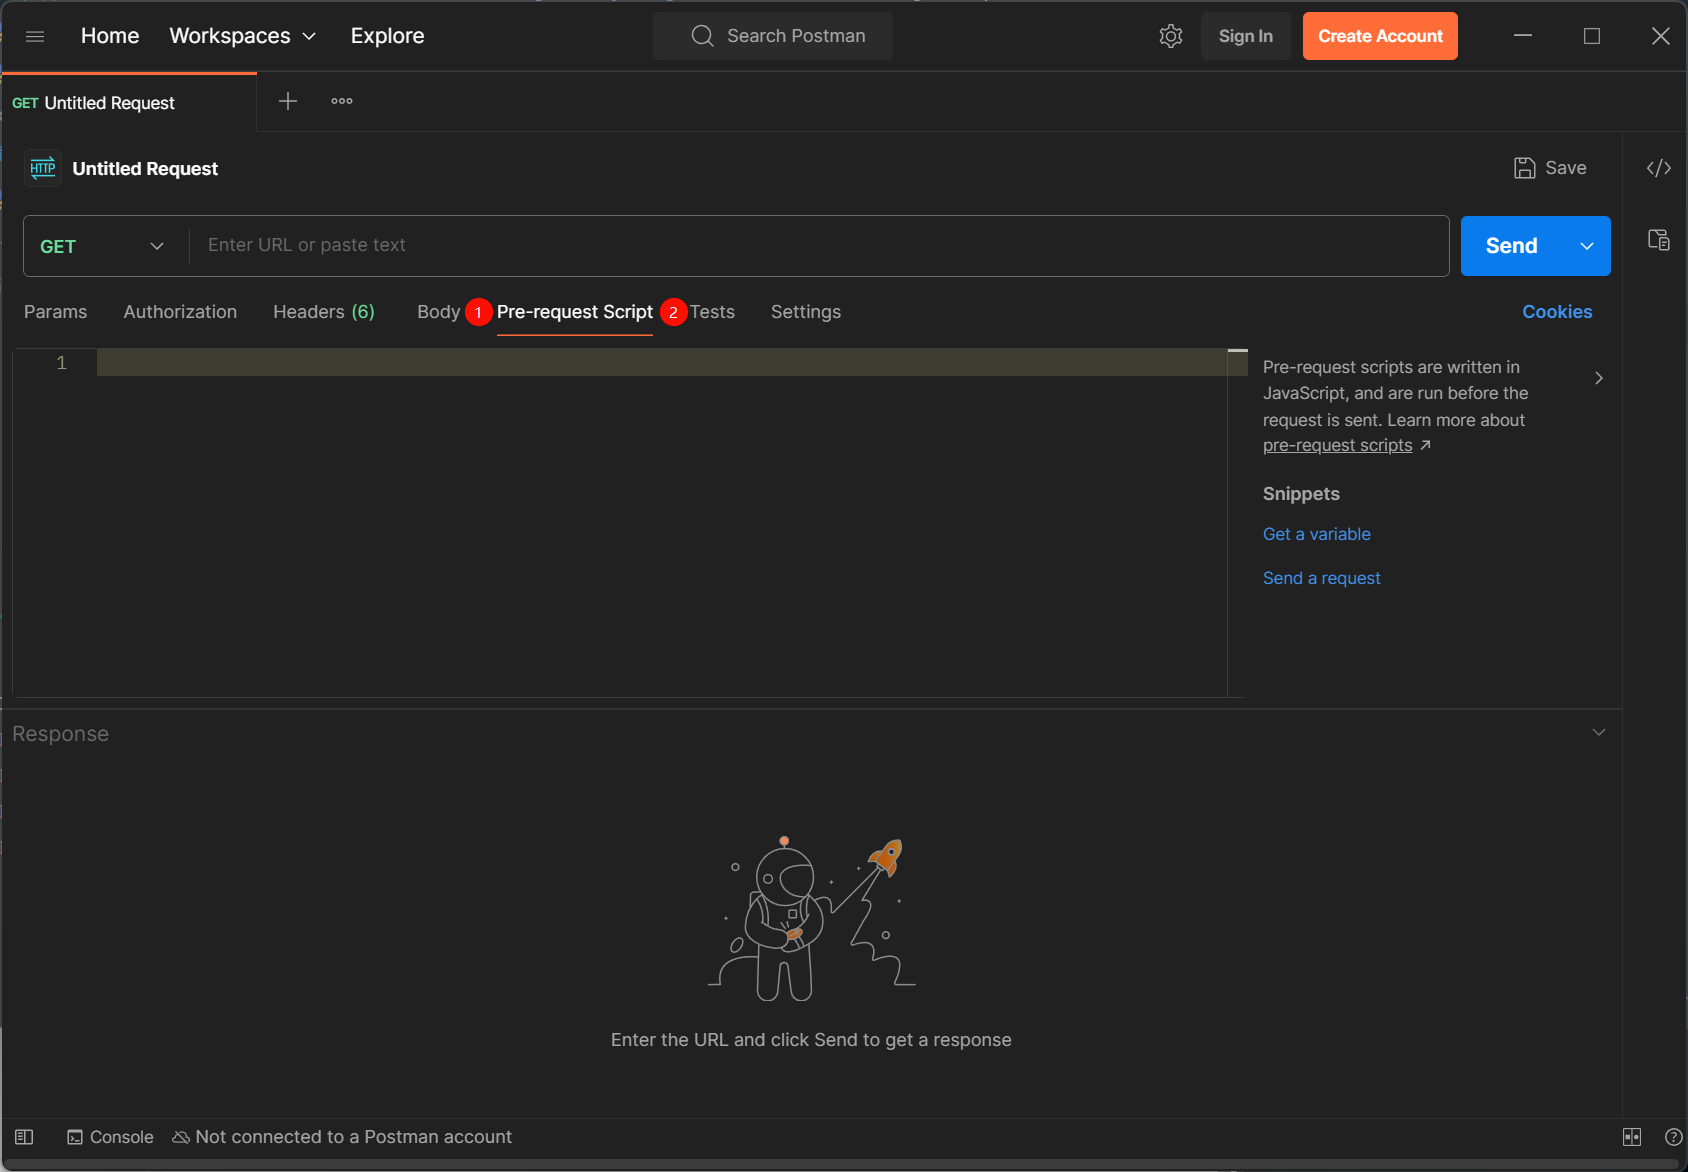
在实际场景中,API 请求往往存在依赖关系(如 “登录获取 Token”→“用 Token 调用其他接口”)。通过 ❶ Pre-request Script / Scripts → Pre-request(请求发送前执行的脚本)和 ❷ Tests / Scripts → Post-response(响应后执行的脚本),可实现动态数据传递。
1.1 提取响应数据并传递给后续请求
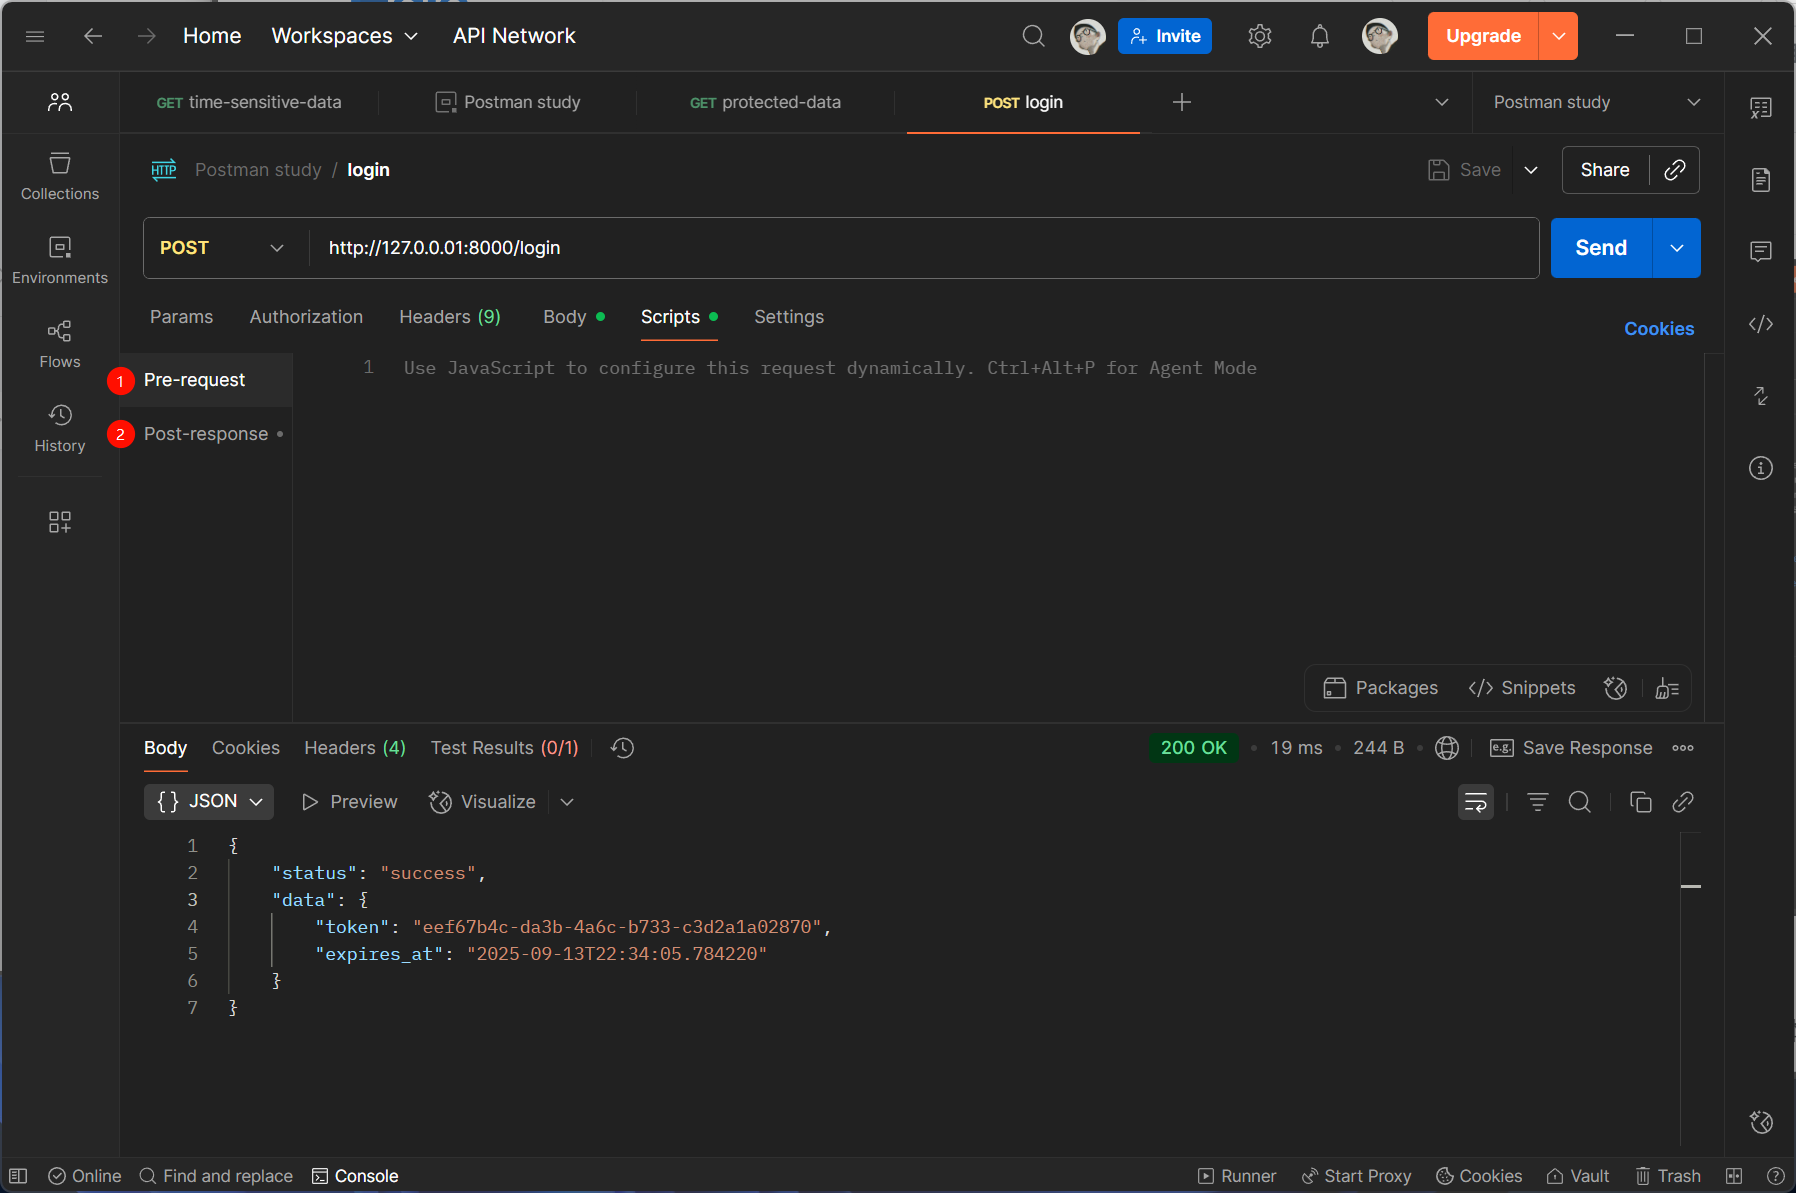
首先新建一个名为 Postman study 的 Collections 和 Enviroments,并根据接口文档调用 /login 接口:
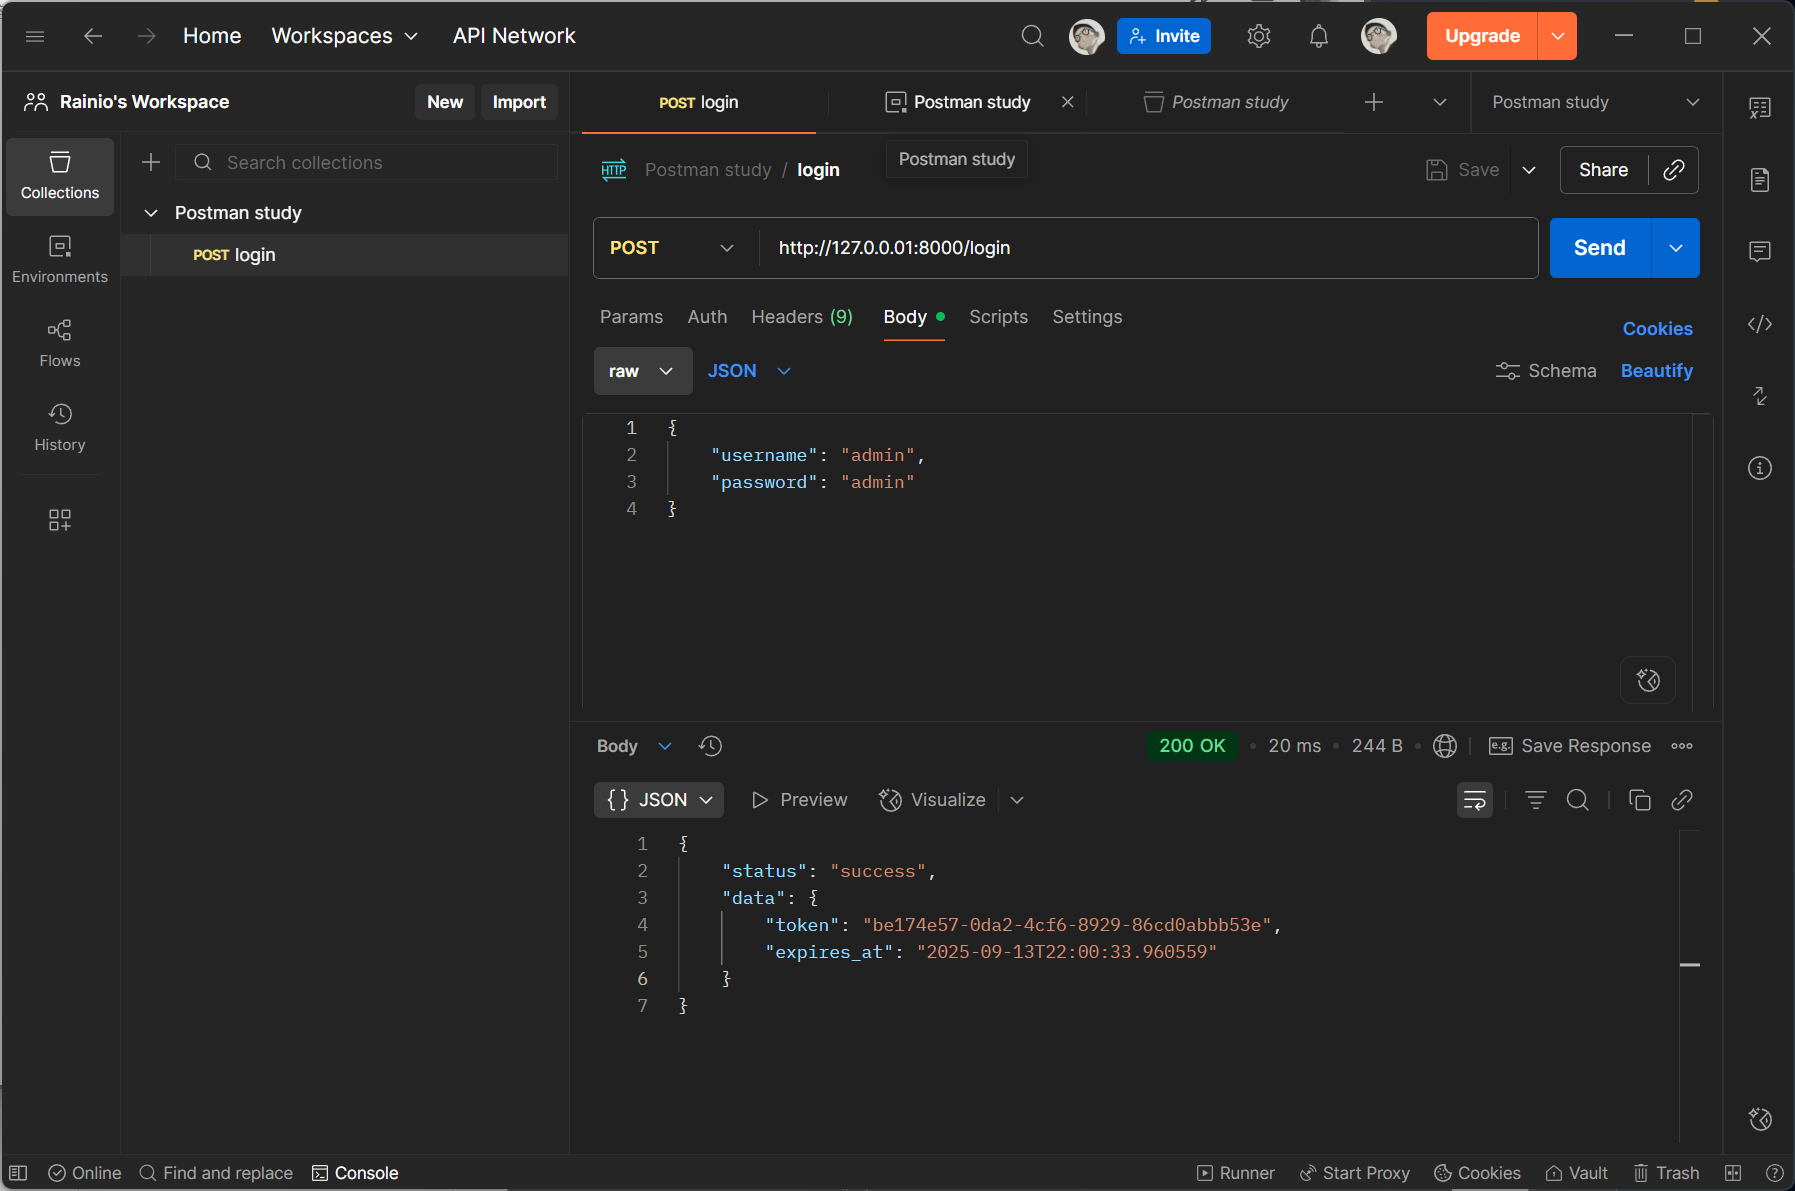
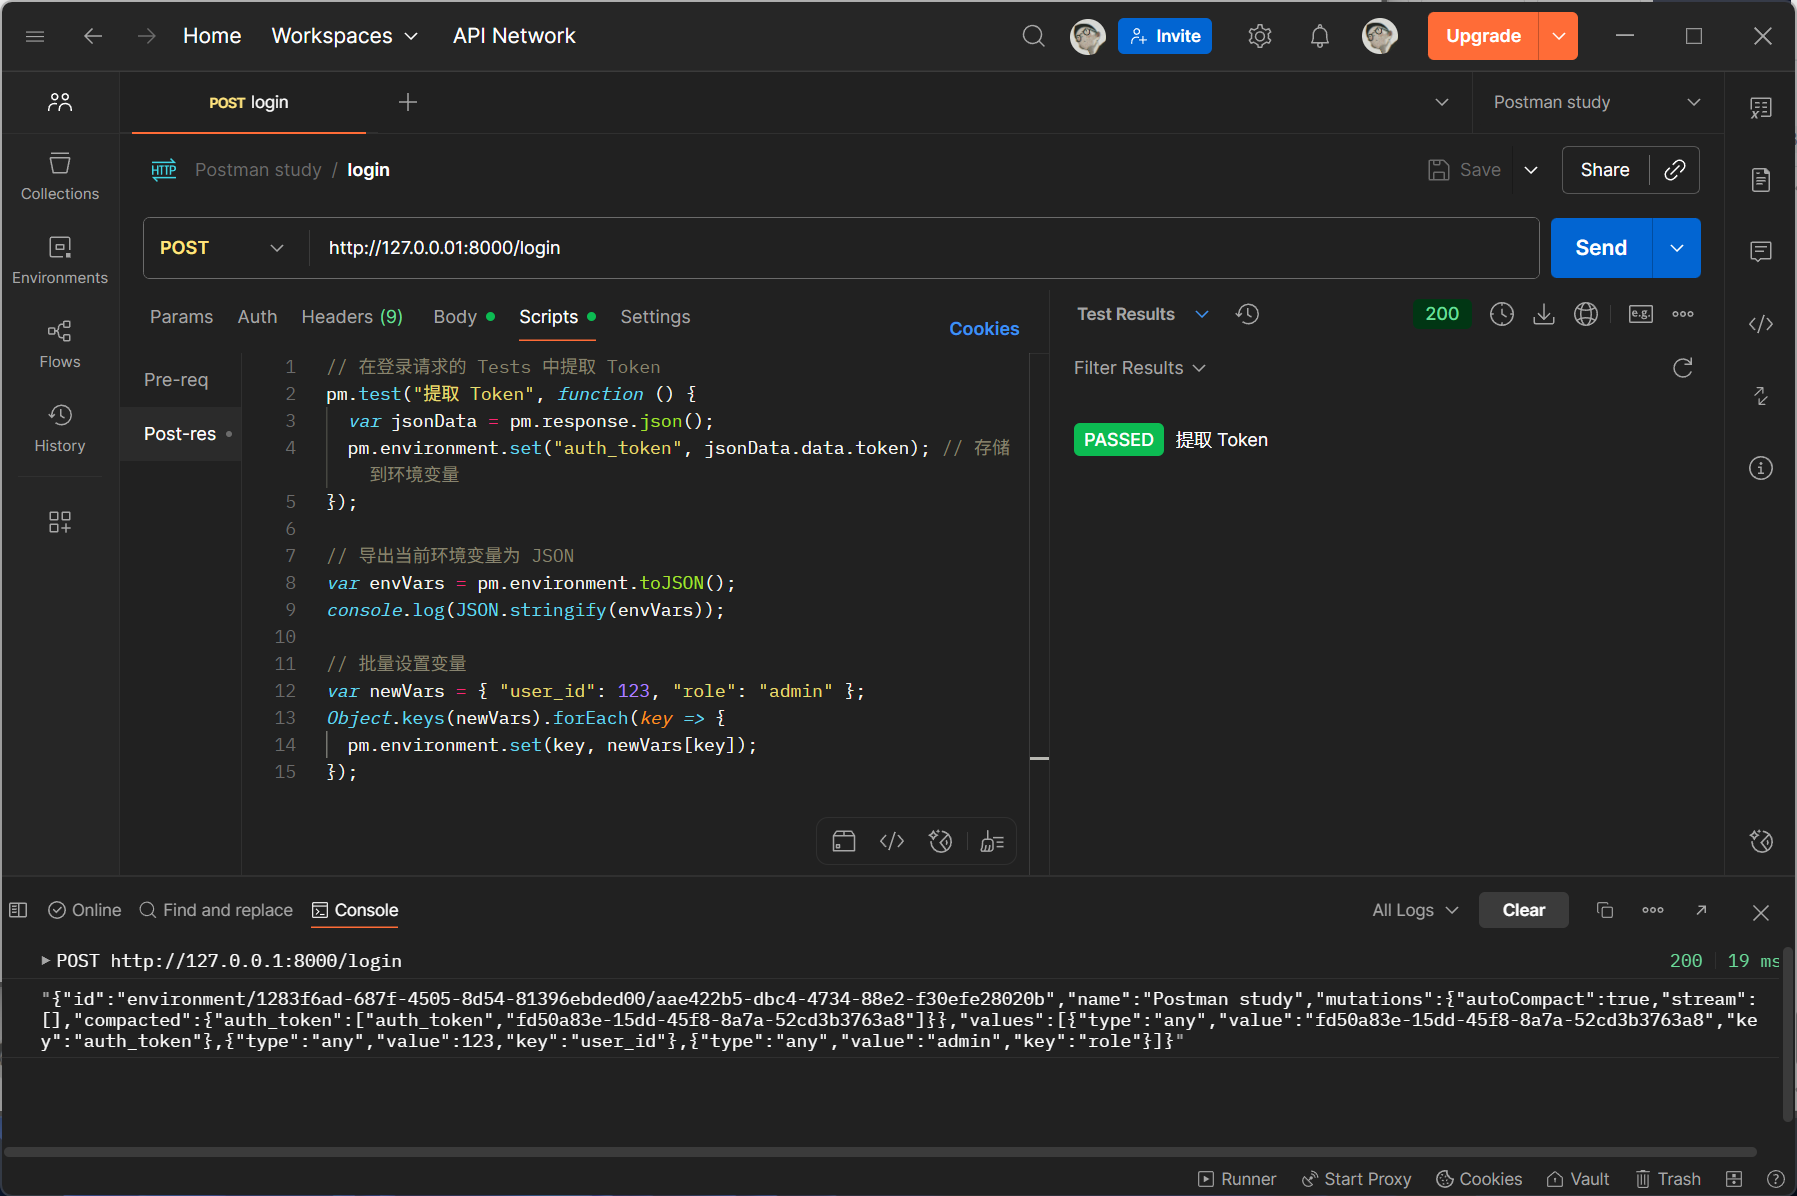
然后使用 /login 接口返回的 token 并根据接口文档调用 /protected-data 接口:
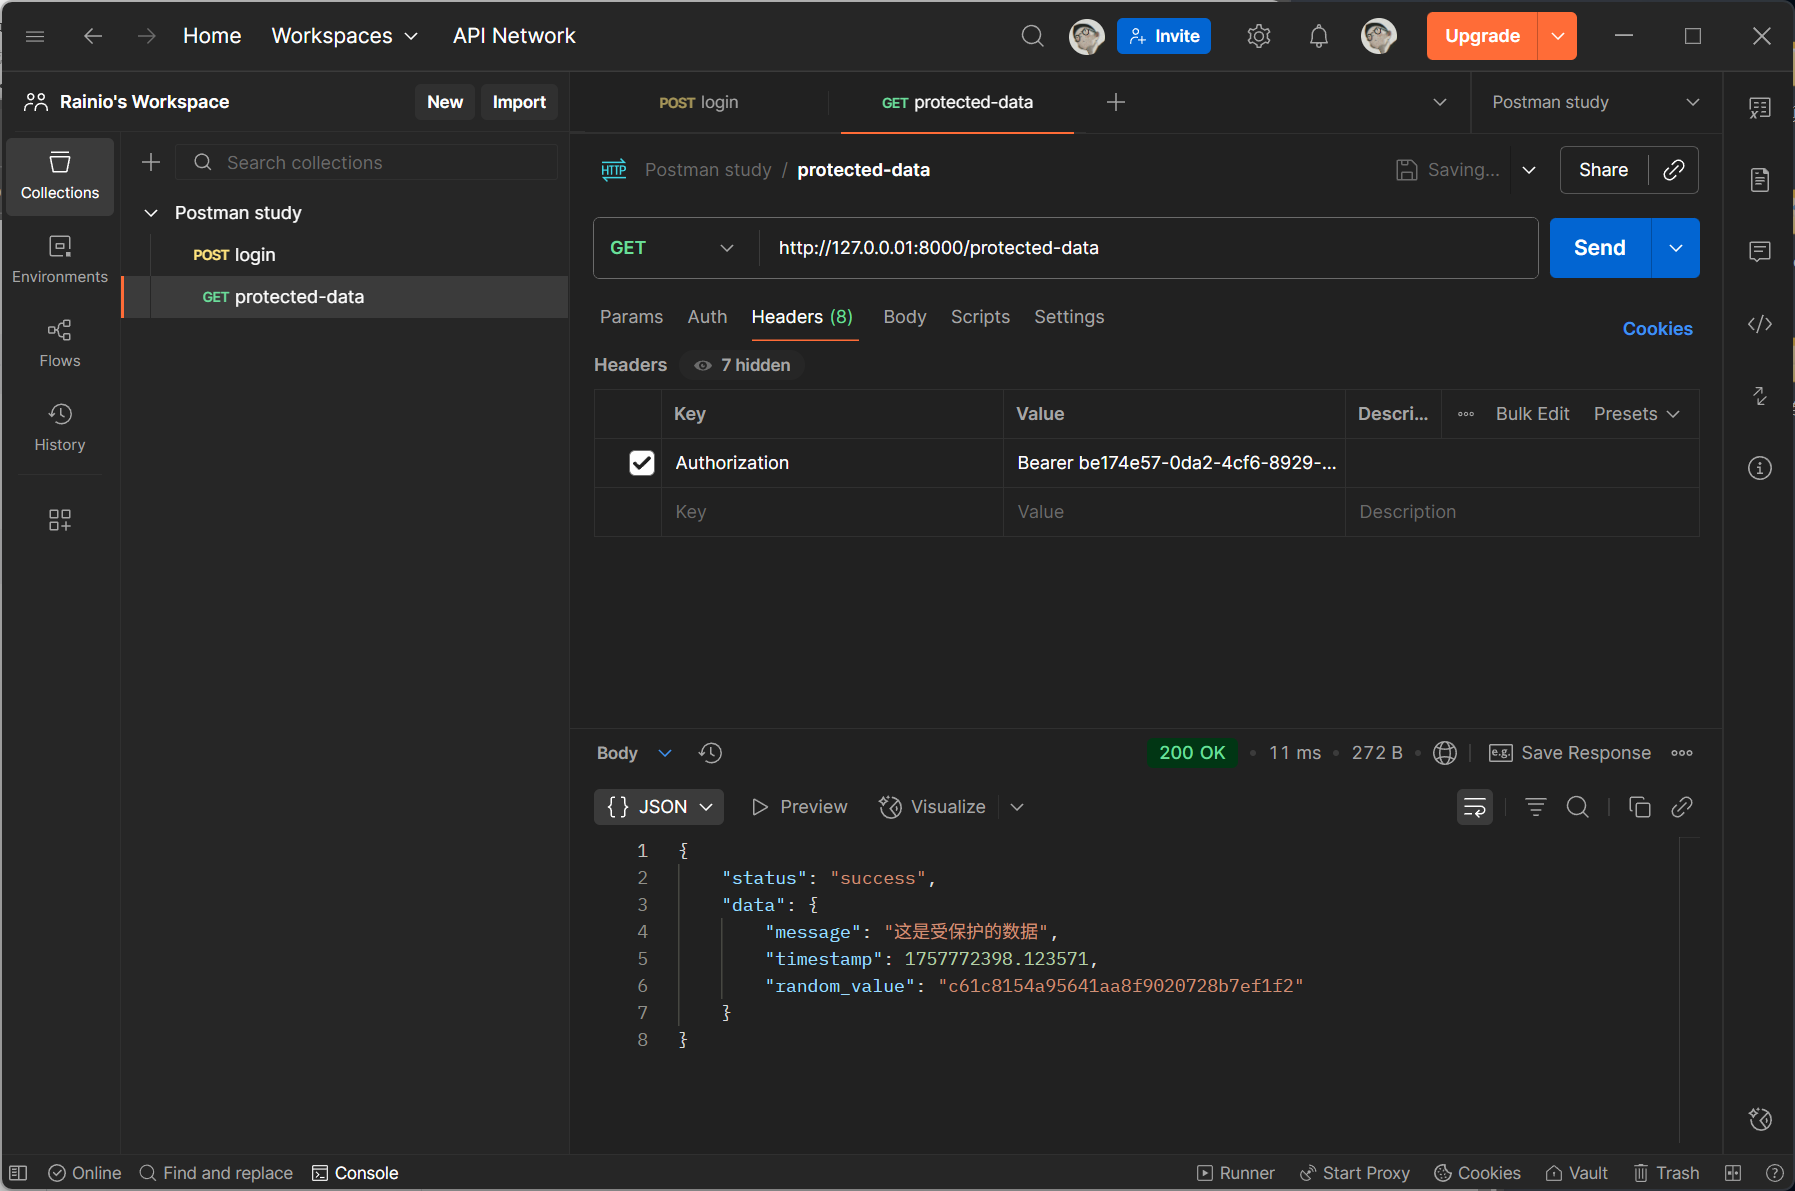
为了使 /protected-data 接口能够使用 /login 接口返回的 token ,我们需要将 /login 接口返回的 token 在后处理中设置为环境变量,供后续请求使用:
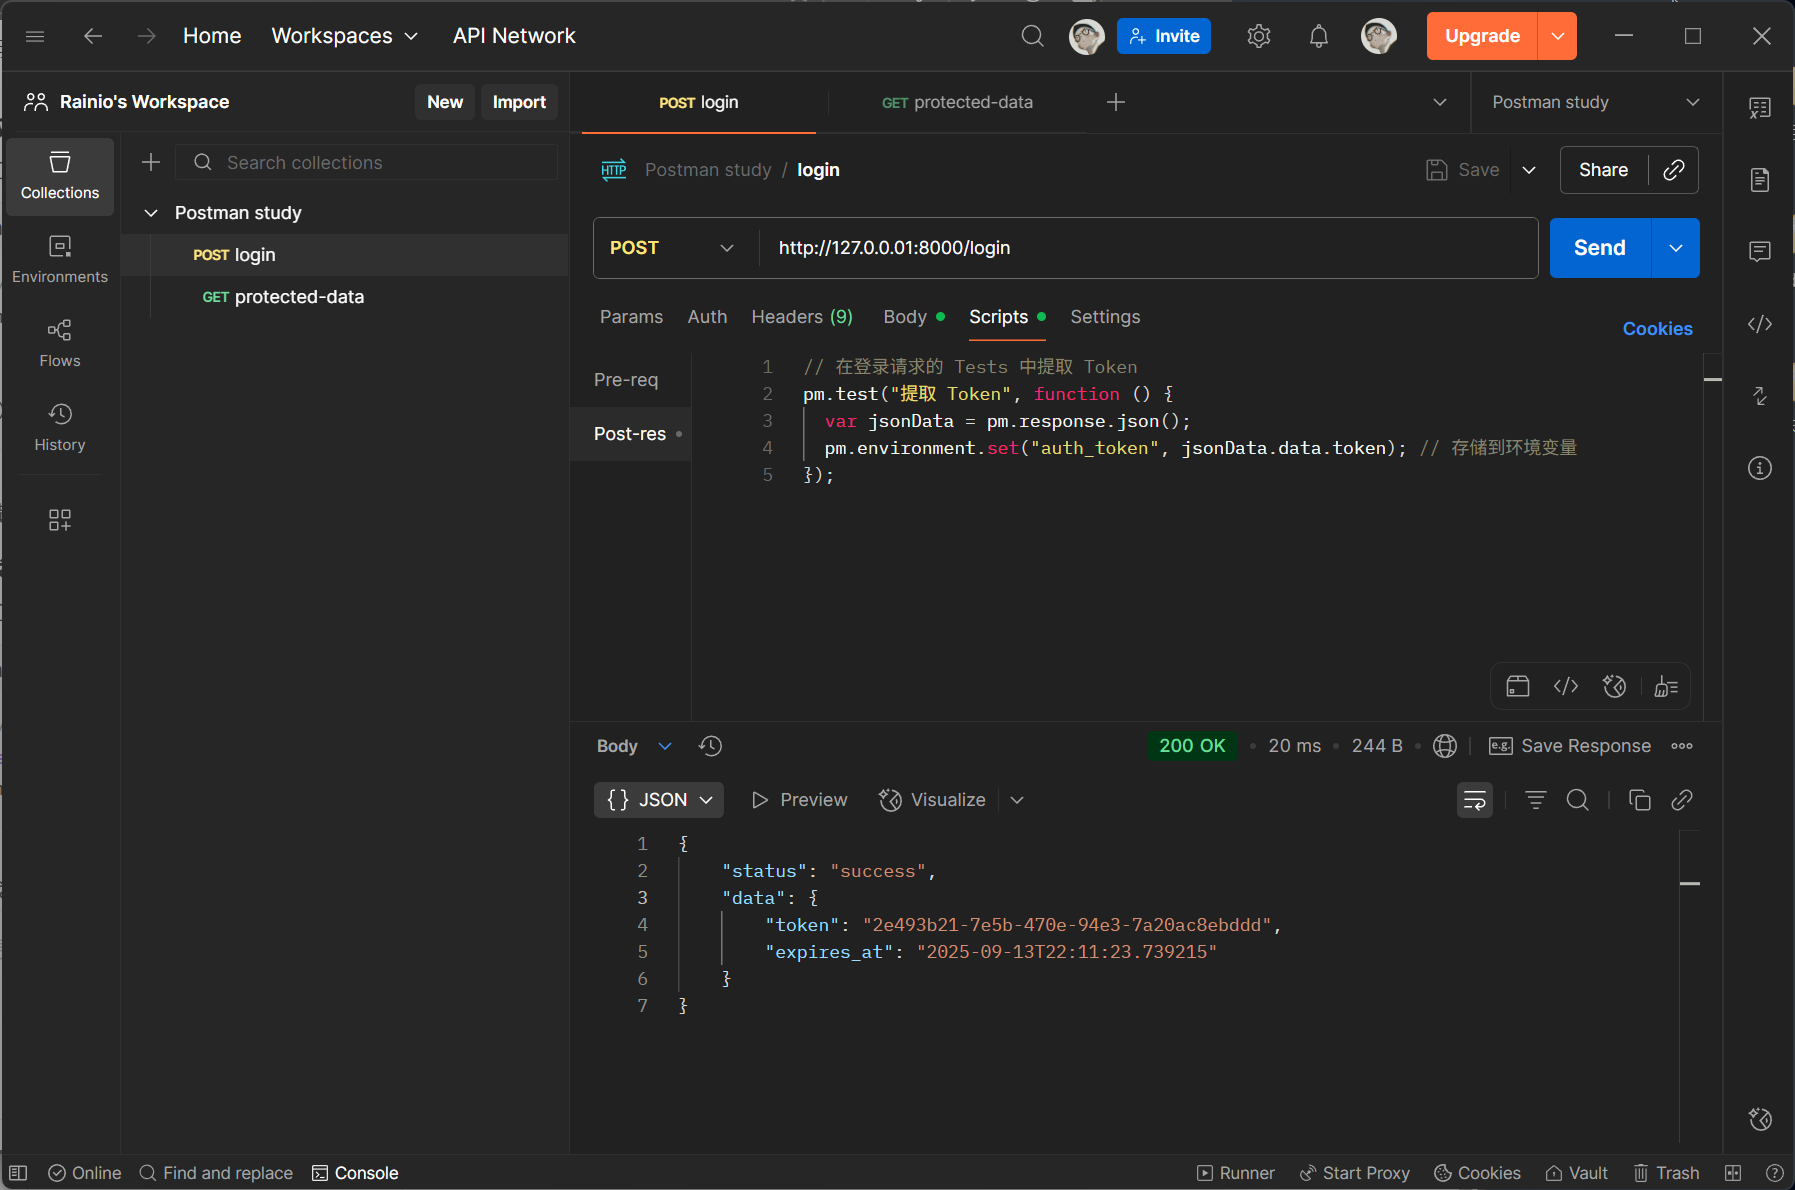
在 /protected-data 接口中使用 {{auth_token}} 使用环境中存储的 token:

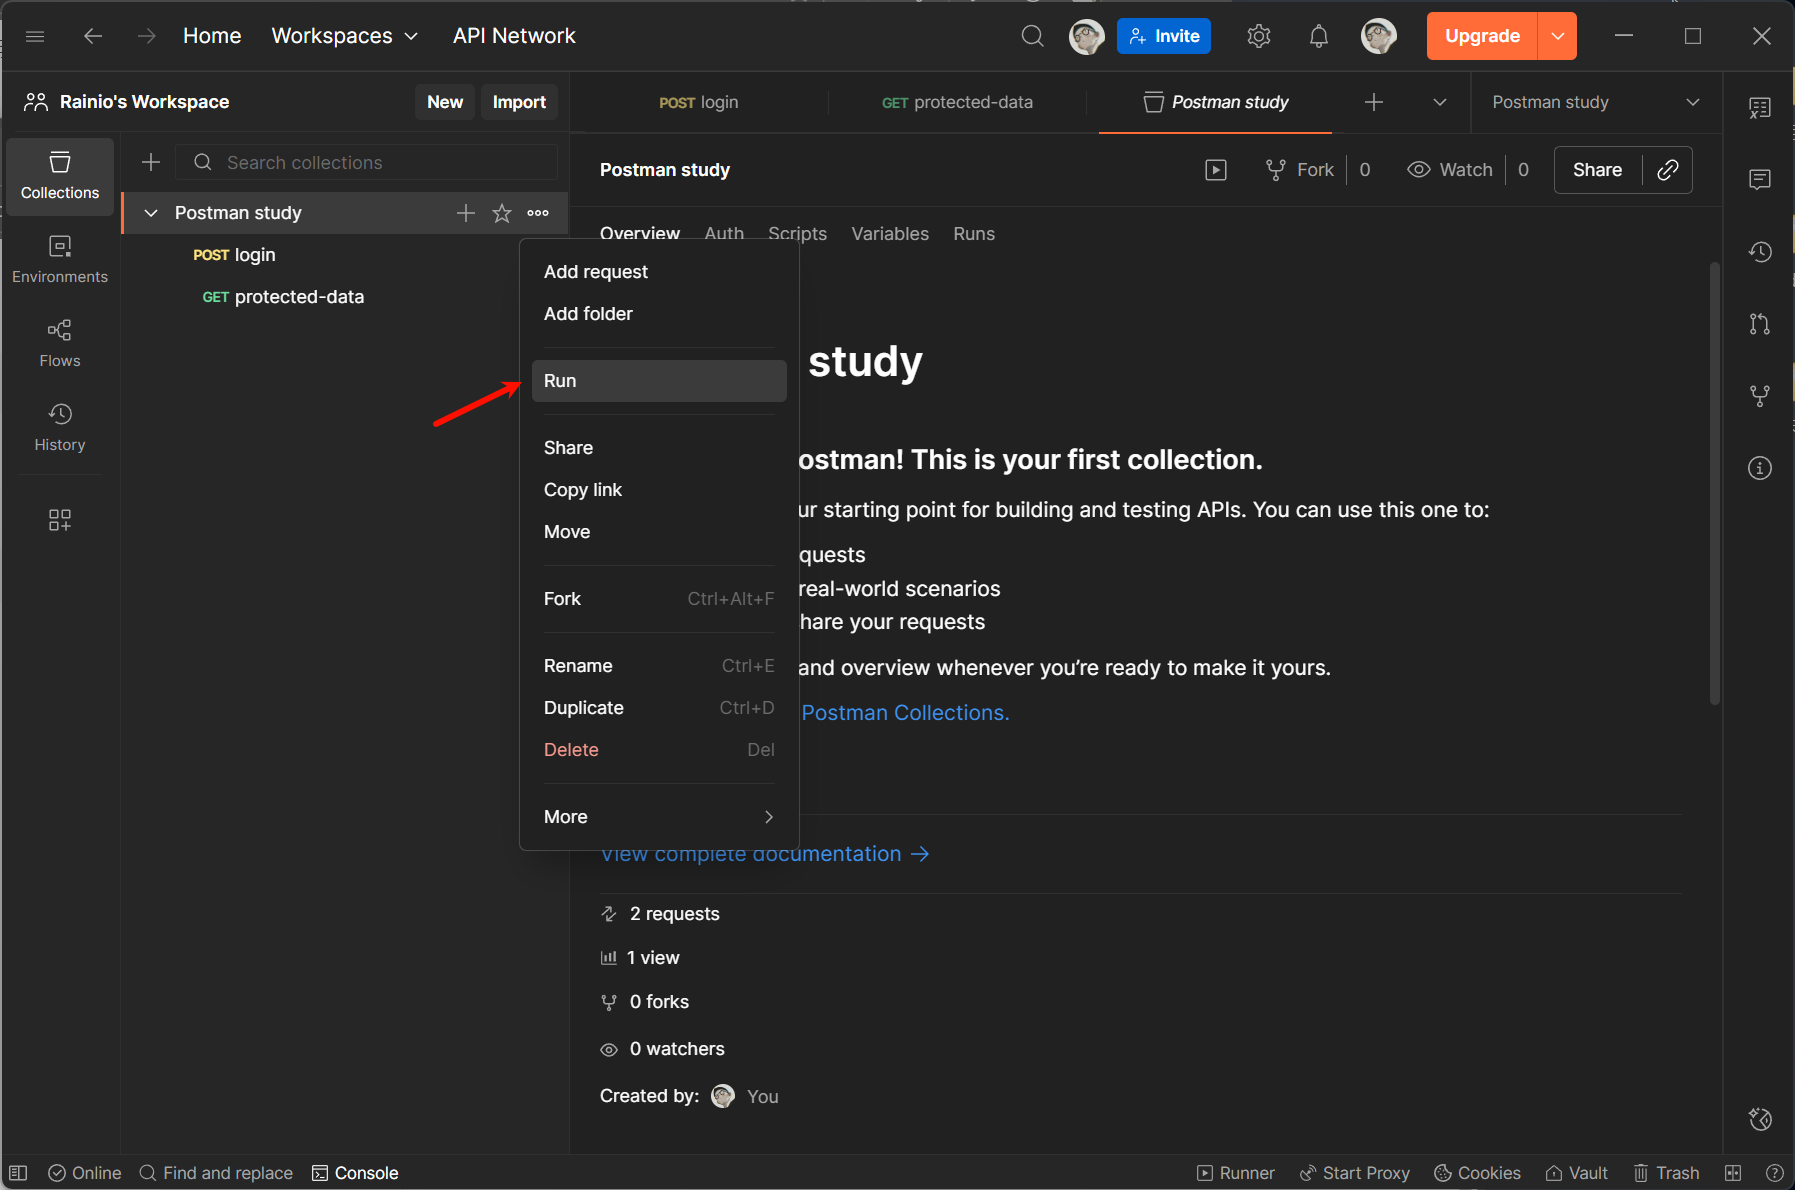
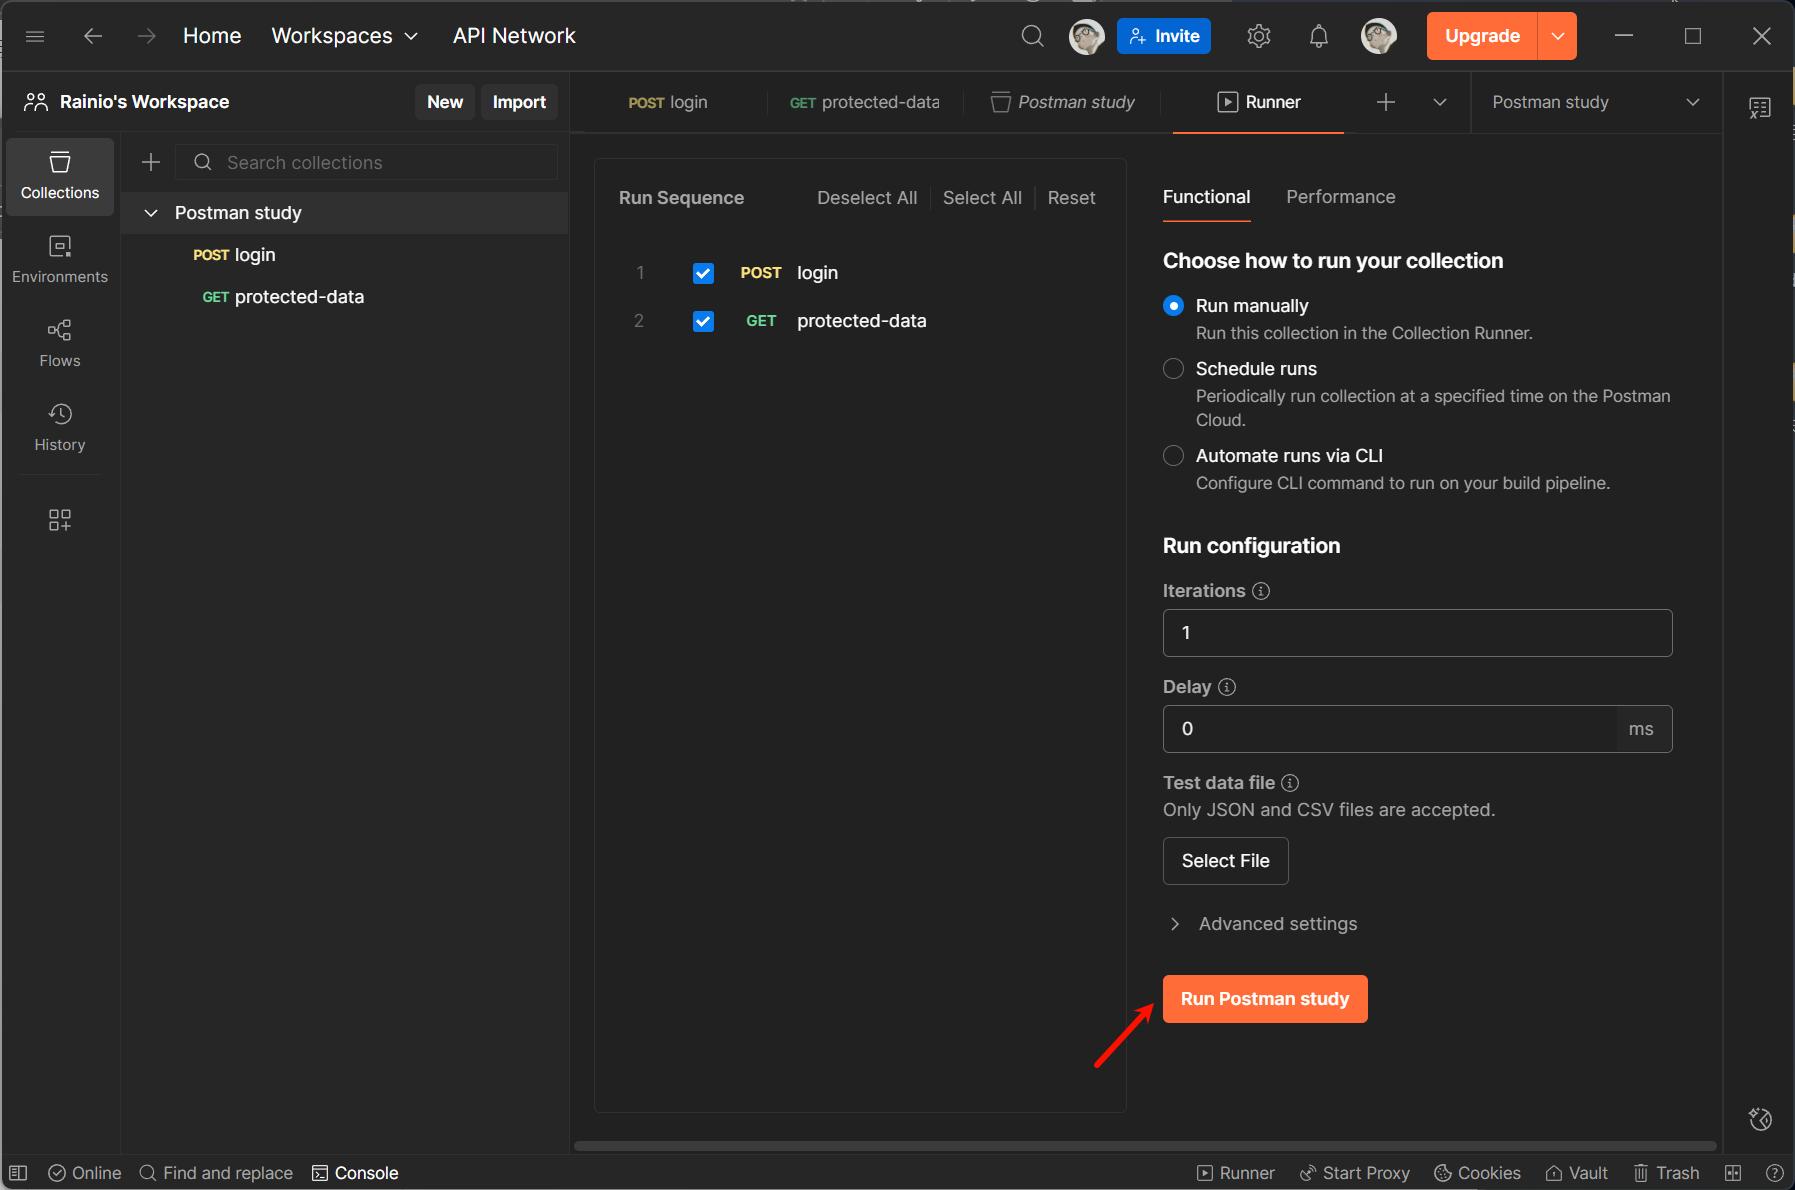
最后,在名为 Postman study 的 Collections 上右键,并点击 Run :
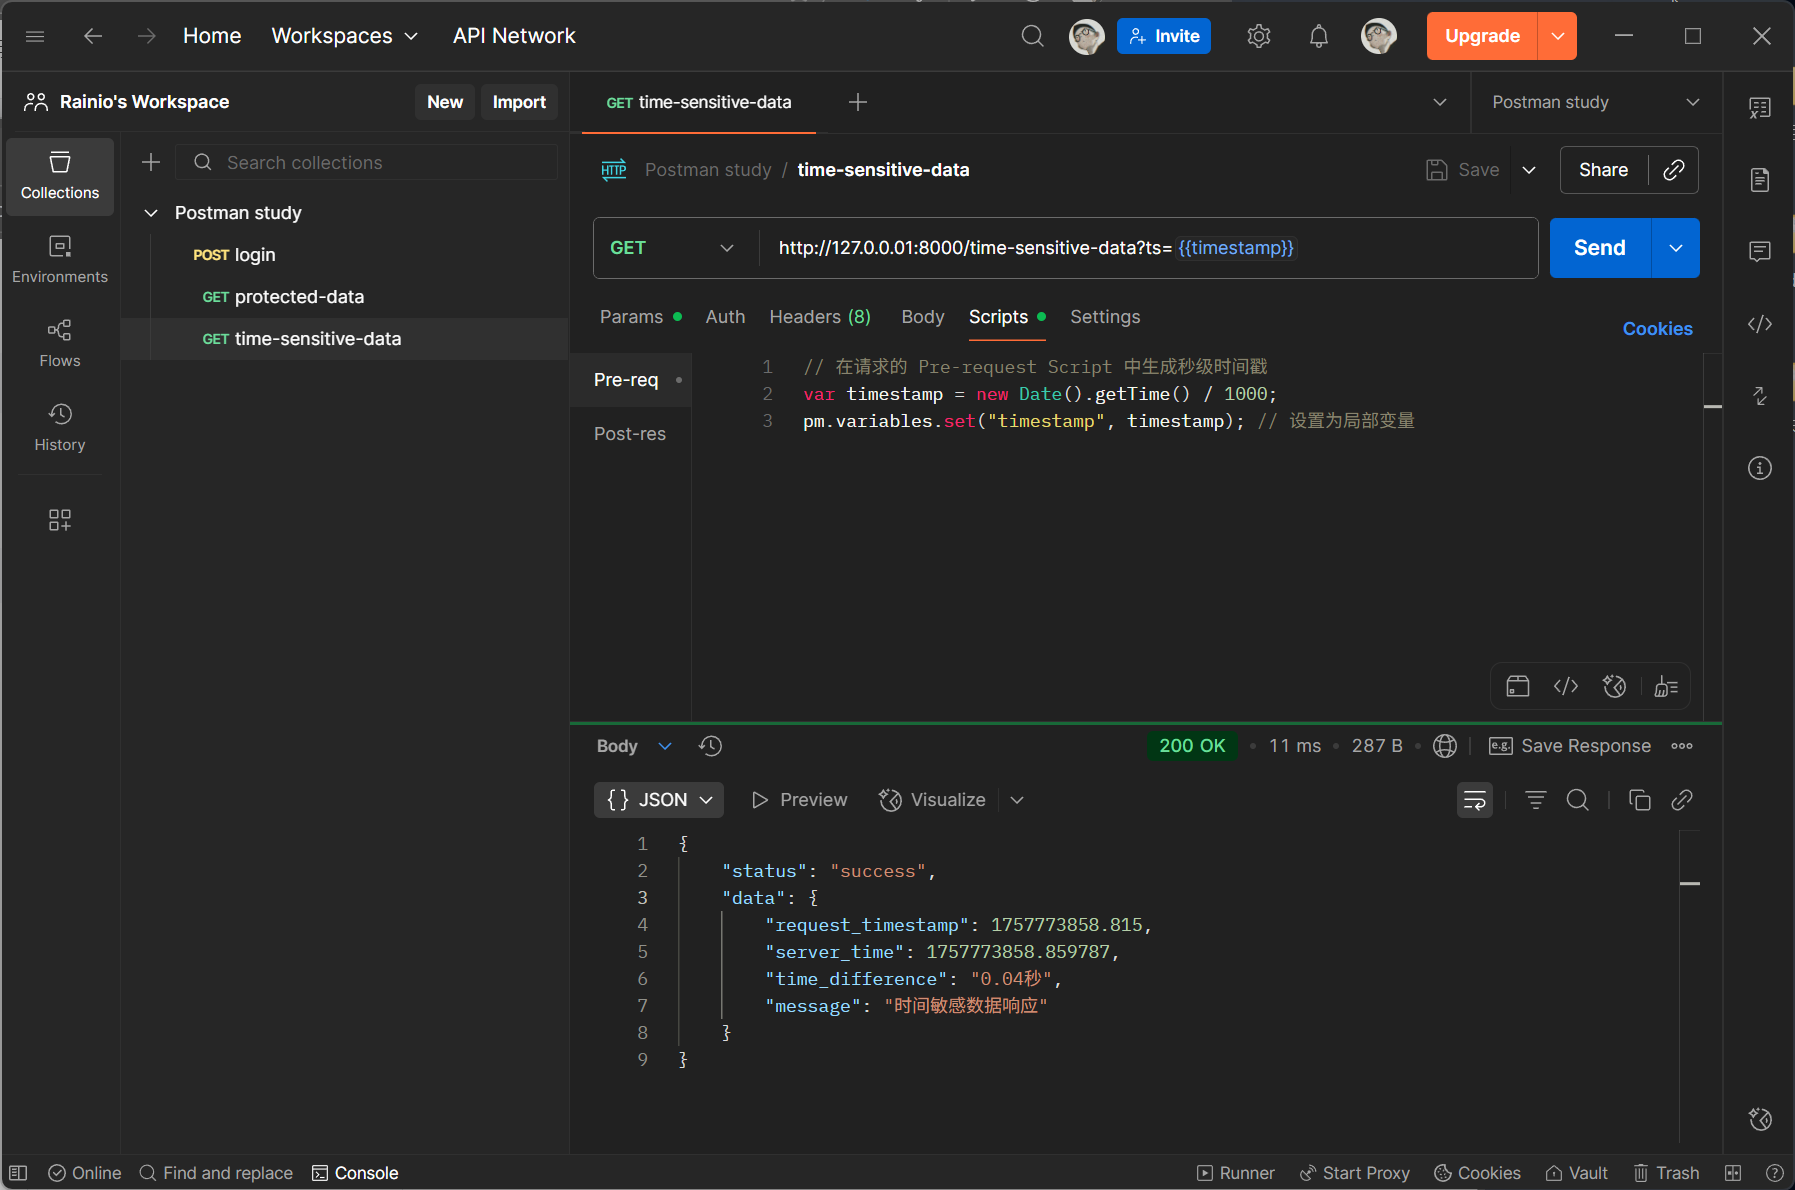
1.2 请求前动态生成参数
例如,将当前时间戳存储在 variables 中,并在请求 URL 中引用 {{timestamp}} 作为请求参数(避免缓存或重复提交):
二、高级测试脚本与断言
将 /login 接口的返回内容修改为:
Tests 脚本不仅能验证简单的状态码,还能实现复杂逻辑判断,结合 Postman 内置的 pm 对象(Postman 全局对象)可完成高级断言。
return {
    "status": "success",
    "data": {
        "token": token,
        "expires_at": datetime.now().isoformat()
    },
    "code": 200,
    "success": True,
}
2.1 复杂响应体校验
验证 JSON 响应中数组长度、嵌套字段、数据类型等:
pm.test("验证用户列表不为空且第一个用户ID正确", function () {
  var jsonData = pm.response.json();
  // 断言数组长度 > 0
  pm.expect(jsonData.data.users).to.be.an("array").that.is.not.empty;
  // 断言嵌套字段类型和值
  pm.expect(jsonData.data.users[0].id).to.be.a("number").and.equal(1001);
  // 断言所有用户状态为"active"
  jsonData.data.users.forEach(user => {
    pm.expect(user.status).to.equal("active");
  });
});
2.2 响应时间监控
确保 API 性能符合预期:
pm.test("API 响应时间应小于 500ms", function () {
  pm.expect(pm.response.responseTime).to.be.below(500);
});
2.3 条件判断与分支执行
根据响应结果动态调整后续逻辑(如不同错误码执行不同断言):
var statusCode = pm.response.code;
if (statusCode === 200) {
  pm.test("成功返回数据", function () {
    pm.expect(pm.response.json().success).to.be.true;
  });
} else if (statusCode === 404) {
  pm.test("资源不存在时提示正确", function () {
    pm.expect(pm.response.json().message).to.include("not found");
  });
}
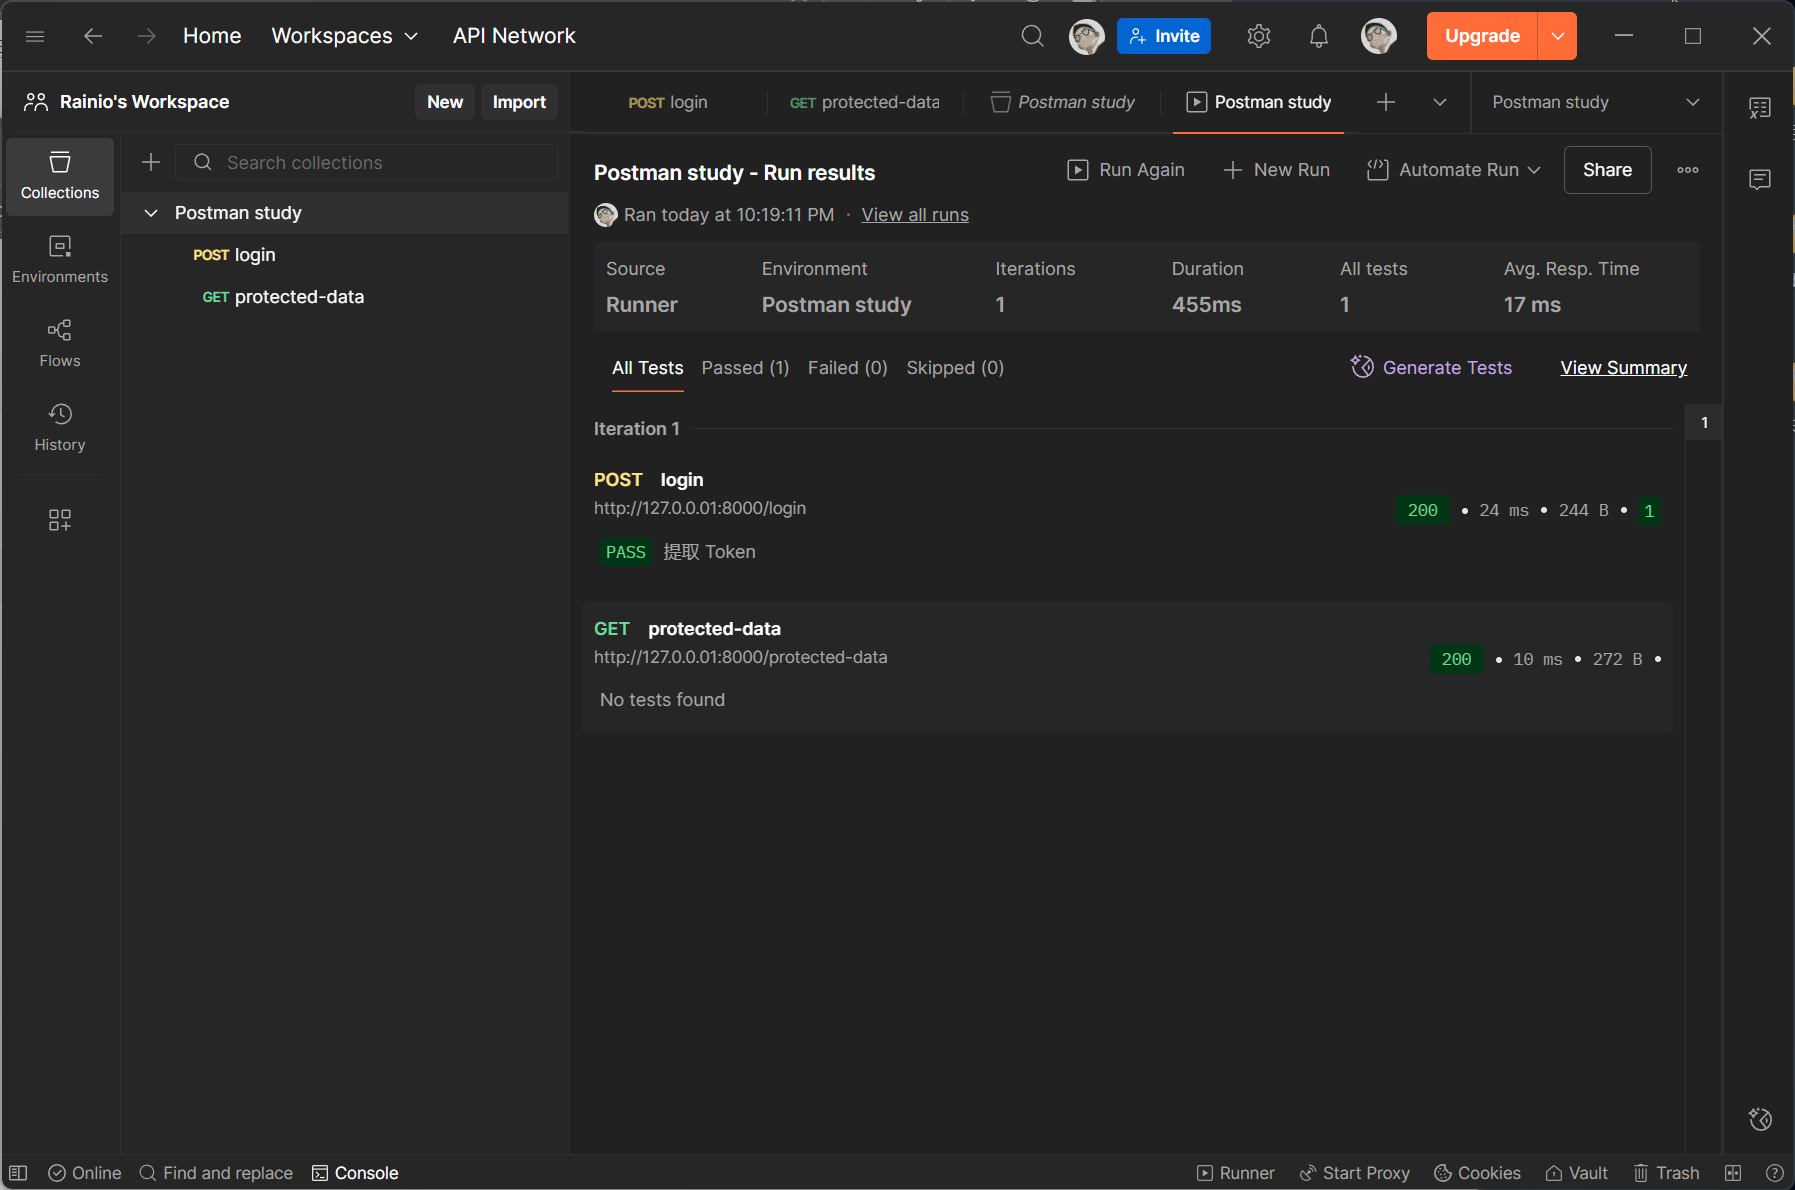
最后,接口执行后会显示测试结果:

三、环境变量与全局变量的进阶管理
除了手动设置变量,还可通过脚本批量操作变量,或结合 变量继承 实现复杂场景。
3.1 批量导入 / 导出变量
通过 pm.environment.toJSON() 和 pm.environment.set() 批量处理:
// 导出当前环境变量为 JSON
var envVars = pm.environment.toJSON();
console.log(JSON.stringify(envVars));

// 批量设置变量
var newVars = { "user_id": 123, "role": "admin" };
Object.keys(newVars).forEach(key => {
  pm.environment.set(key, newVars[key]);
});
3.2 变量优先级与作用域控制
当多个作用域变量名重复时,高优先级变量会覆盖低优先级,顺序为:
局部变量 > 集合变量 > 环境变量 > 全局变量
| 作用域 | 生效范围 | 核心用途 | 示例 |
|---|---|---|---|
| 局部变量 | 仅当前请求 / 脚本执行周期 | 存临时数据,执行后销毁 | 生成随机验证码、临时 token |
| 集合变量 | 整个 API 集合(含子文件夹) | 存集合内通用配置,统一管理 | API 版本(v2)、固定请求头 |
| 环境变量 | 当前选中的环境(如 “开发”“生产”) | 区分多环境配置,快速切换 | 开发环境 base_url(http://dev.xxx)、生产 base_url(http://prod.xxx) |
| 全局变量 | 整个 Postman 工作空间 | 存所有集合 / 环境通用的数据 | 通用超时时间、全局测试账号 |
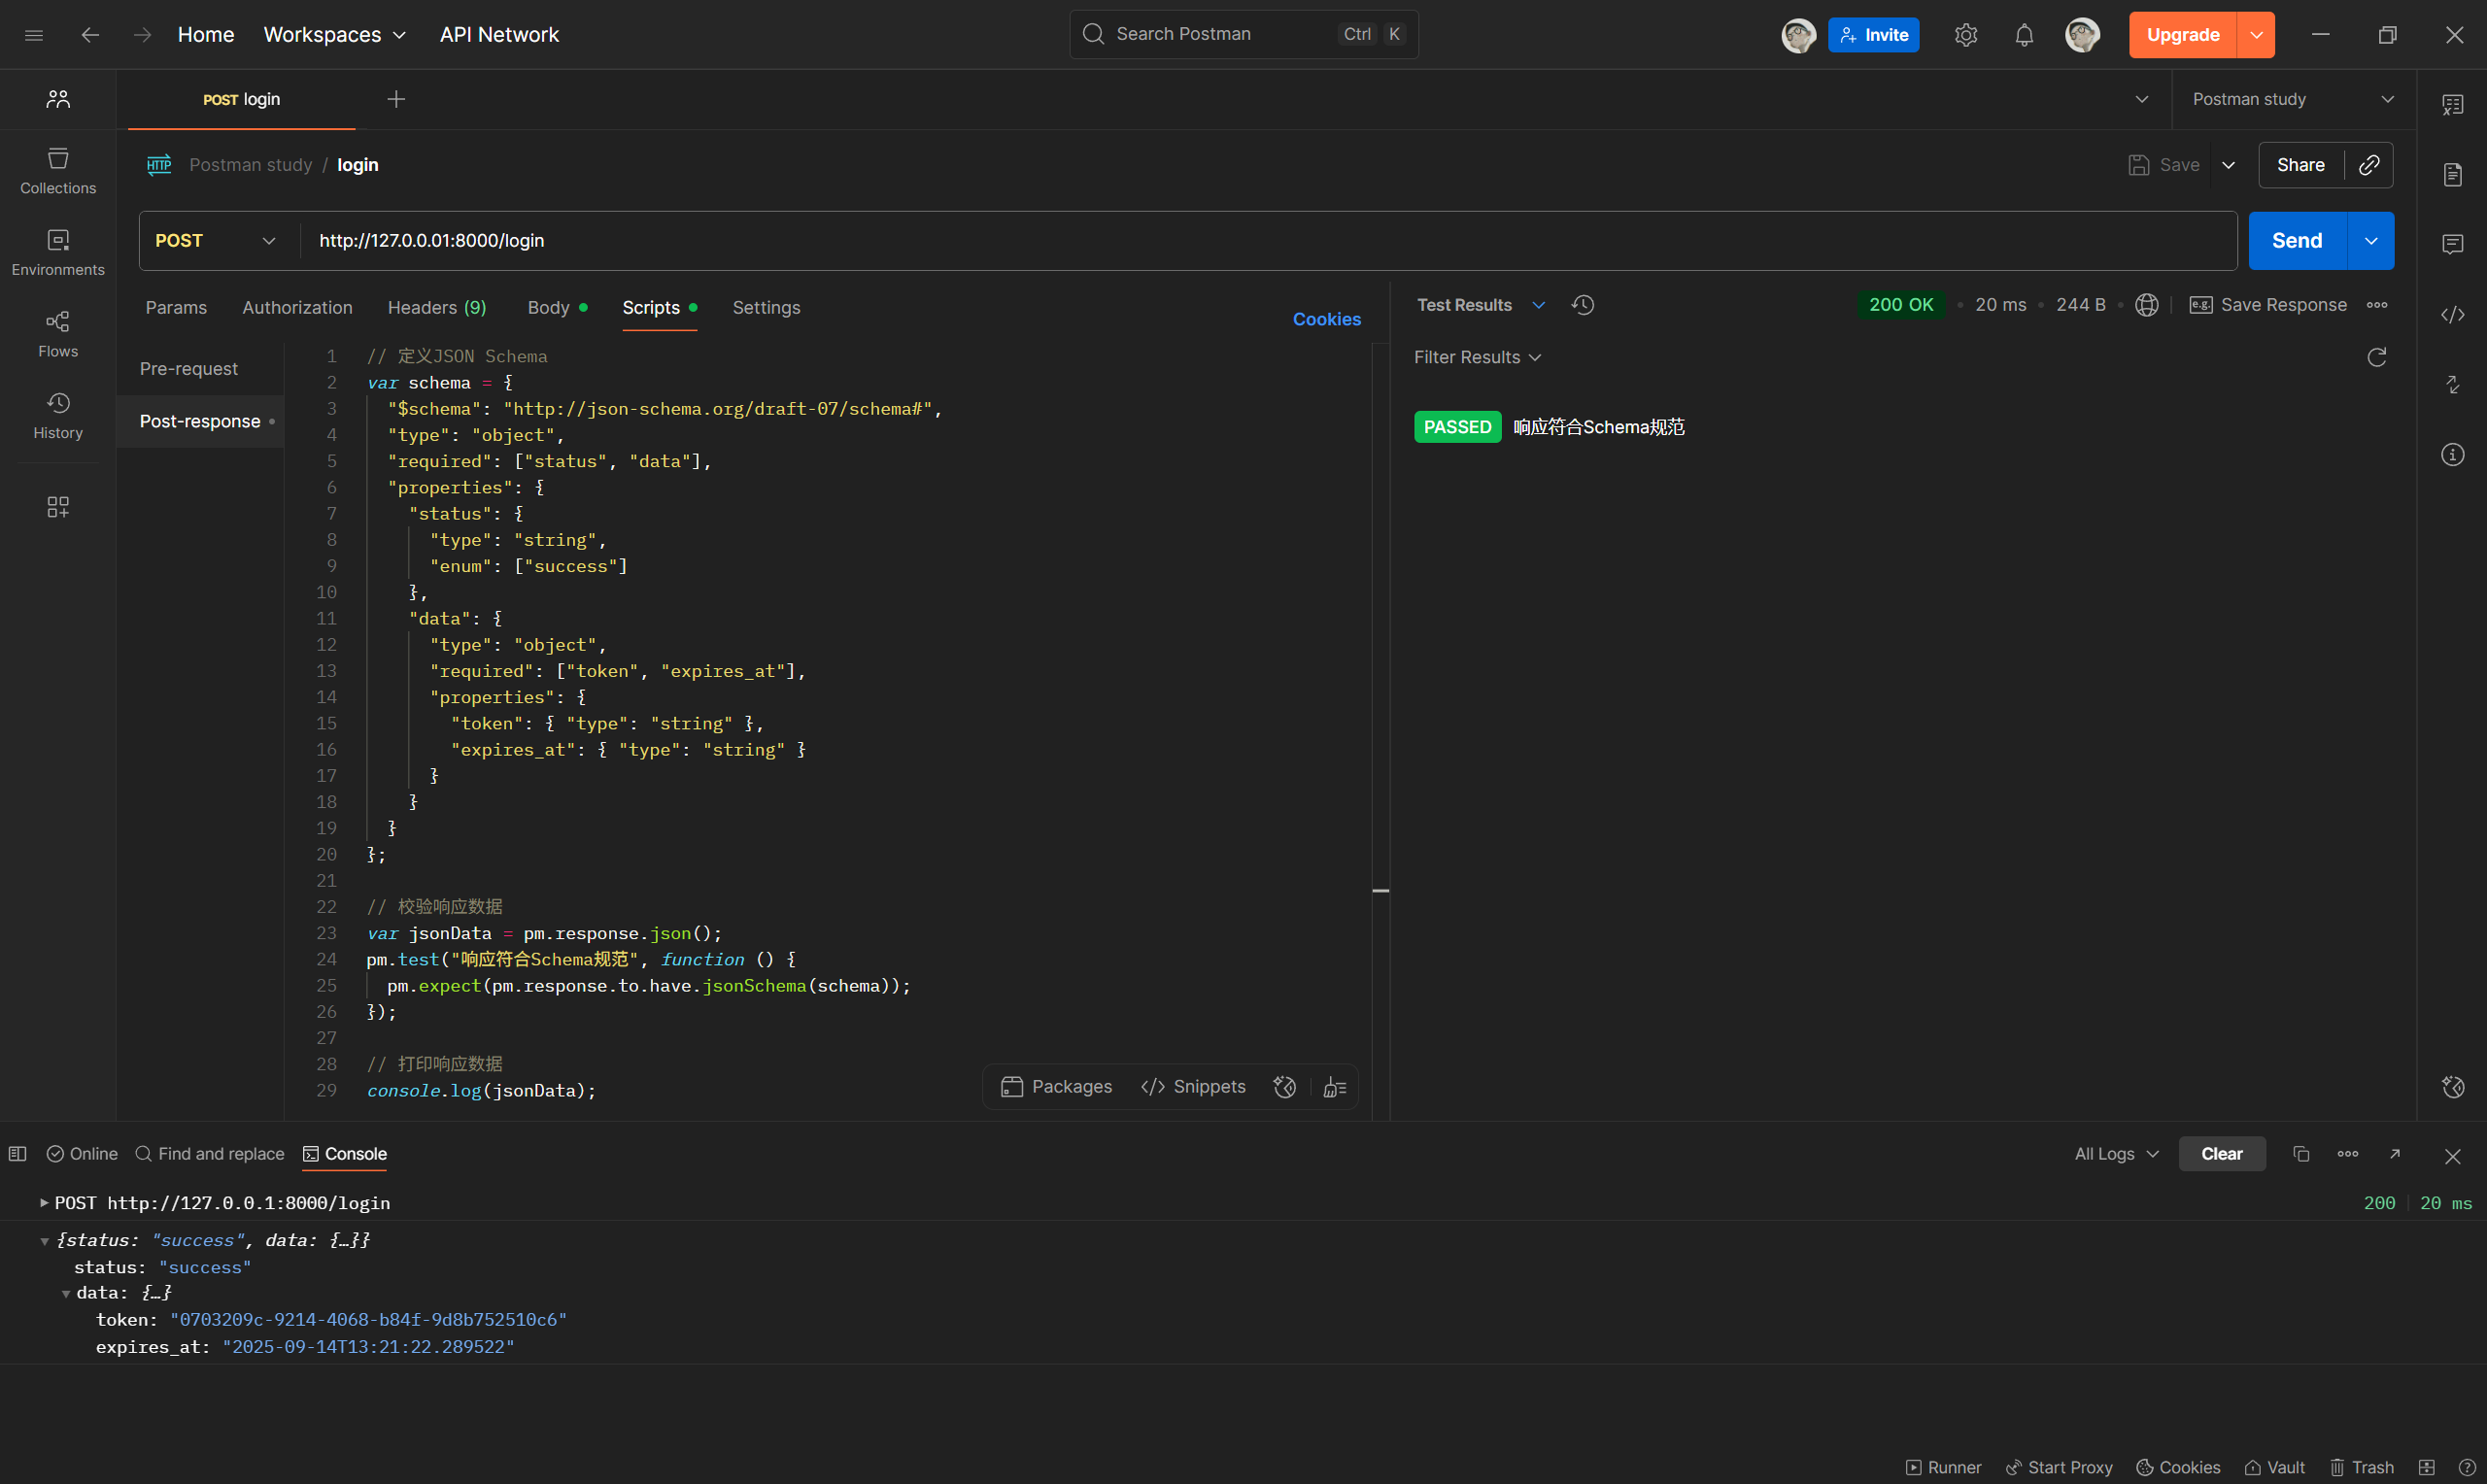
四、API 契约测试
通过验证响应是否符合预设的 JSON Schema,确保 API 输出格式的一致性(尤其适合前后端协作或第三方接口对接)。
// 定义JSON Schema
var schema = {
  "$schema": "http://json-schema.org/draft-07/schema#",
  "type": "object",
  "required": ["status", "data"],
  "properties": {
    "status": {
      "type": "string",
      "enum": ["success"]
    },
    "data": {
      "type": "object",
      "required": ["token", "expires_at"],
      "properties": {
        "token": { "type": "string" },
        "expires_at": { "type": "string" }
      }
    }
  }
};

// 校验响应数据
var jsonData = pm.response.json();
pm.test("响应符合Schema规范", function () {
  pm.expect(pm.response.to.have.jsonSchema(schema));
});

// 打印响应数据
console.log(jsonData);
五、Mock Server 模拟接口
Mock 服务是 Postman 中用于模拟 API 接口响应的核心功能,尤其适用于前后端分离开发、第三方接口未就绪等场景。以下将按照指定目录,详细介绍从新建 Mock 服务到调用的完整流程。
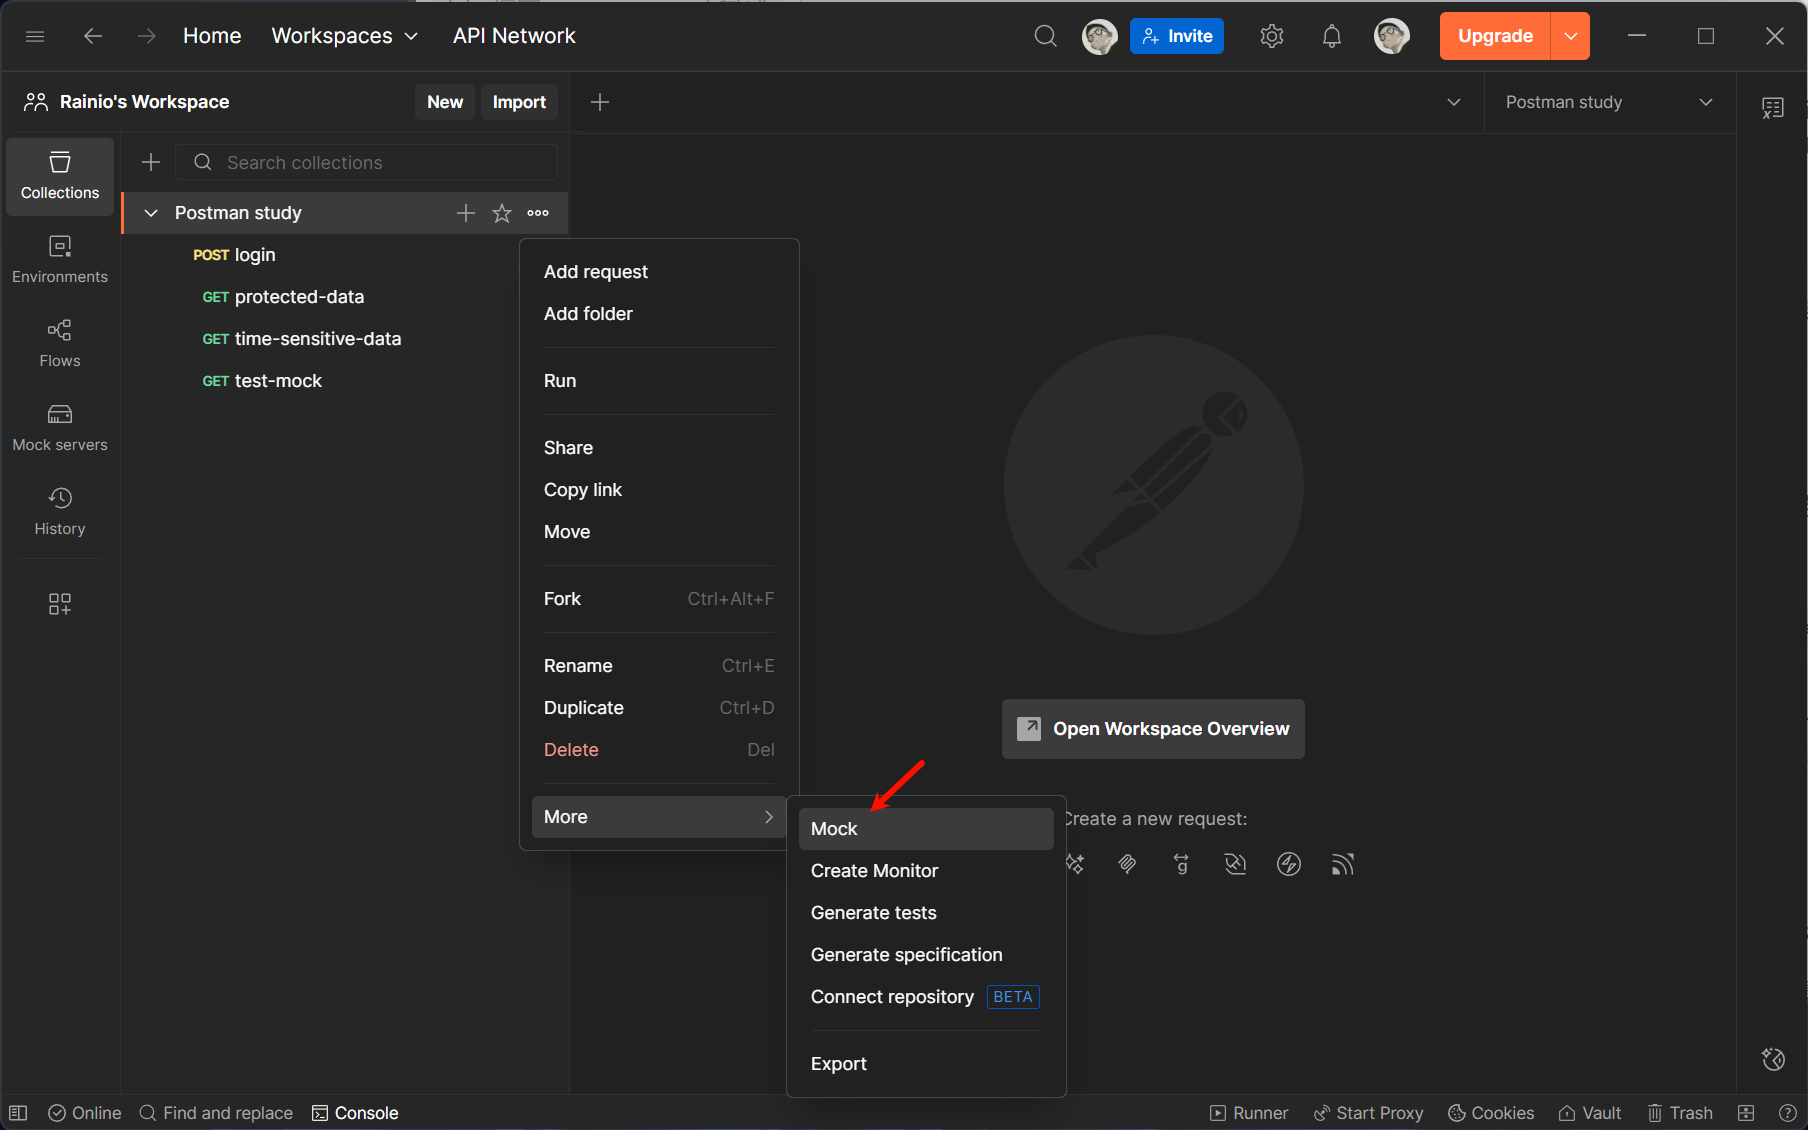
5.1 新建 Mock 服务
新建 Mock 服务是使用 Mock 功能的第一步,Postman 提供了 “基于集合(Collection)创建” 和 “直接创建空白 Mock 服务” 两种方式,前者更贴合实际项目接口管理逻辑,推荐优先使用。
方式 1:基于集合(Collection)创建(推荐)
-
准备集合:打开 Postman 左侧导航栏的「Collections」,确保已创建目标集合(若未创建,点击「+ Create Collection」输入名称即可)。
-
发起创建:
- 右键点击目标集合,在弹出菜单中选择「Mock Collection」;
- 或进入集合详情页,点击右上角「…」(更多操作),选择「Mock」。
-
配置 Mock 服务:在弹出的「Create a Mock Server」窗口中,填写关键信息:
- Mock Server Name:输入 Mock 服务名称(如 “用户模块 Mock 服务”),便于后续识别;
- Environment(可选):选择关联的环境(若需在响应中引用环境变量,如
{{baseUrl}},需提前配置环境); - Delay(可选):设置响应延迟(如 500ms),模拟真实网络耗时;
- Mock Server Visibility:选择可见性(
Private仅自己可见,Team团队成员可见,需登录 Postman 账号)。
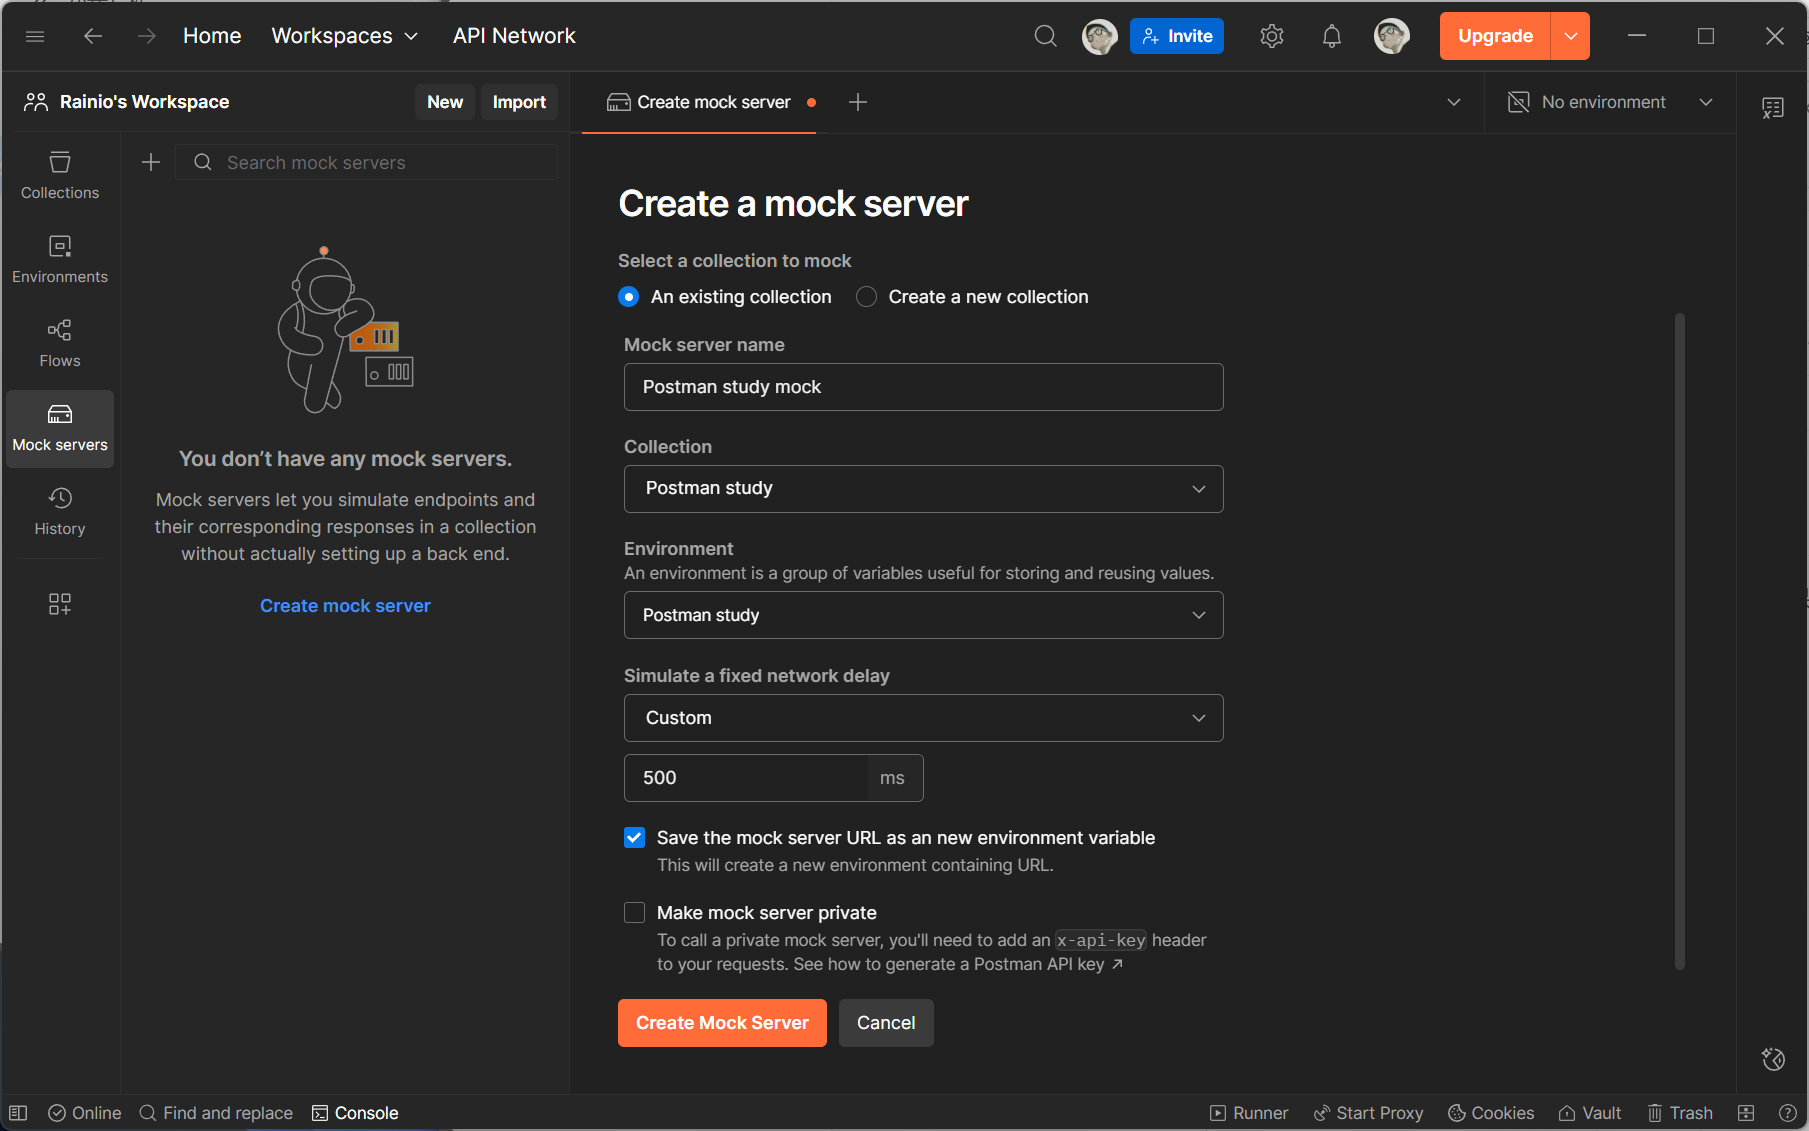
-
确认创建:点击「Create Mock Server」,Postman 会自动生成一个唯一的 Mock 服务 URL(格式如
https://xxxx-xxxx-xxxx.mock.pstmn.io),需复制保存该 URL,后续调用 Mock 接口时会用到。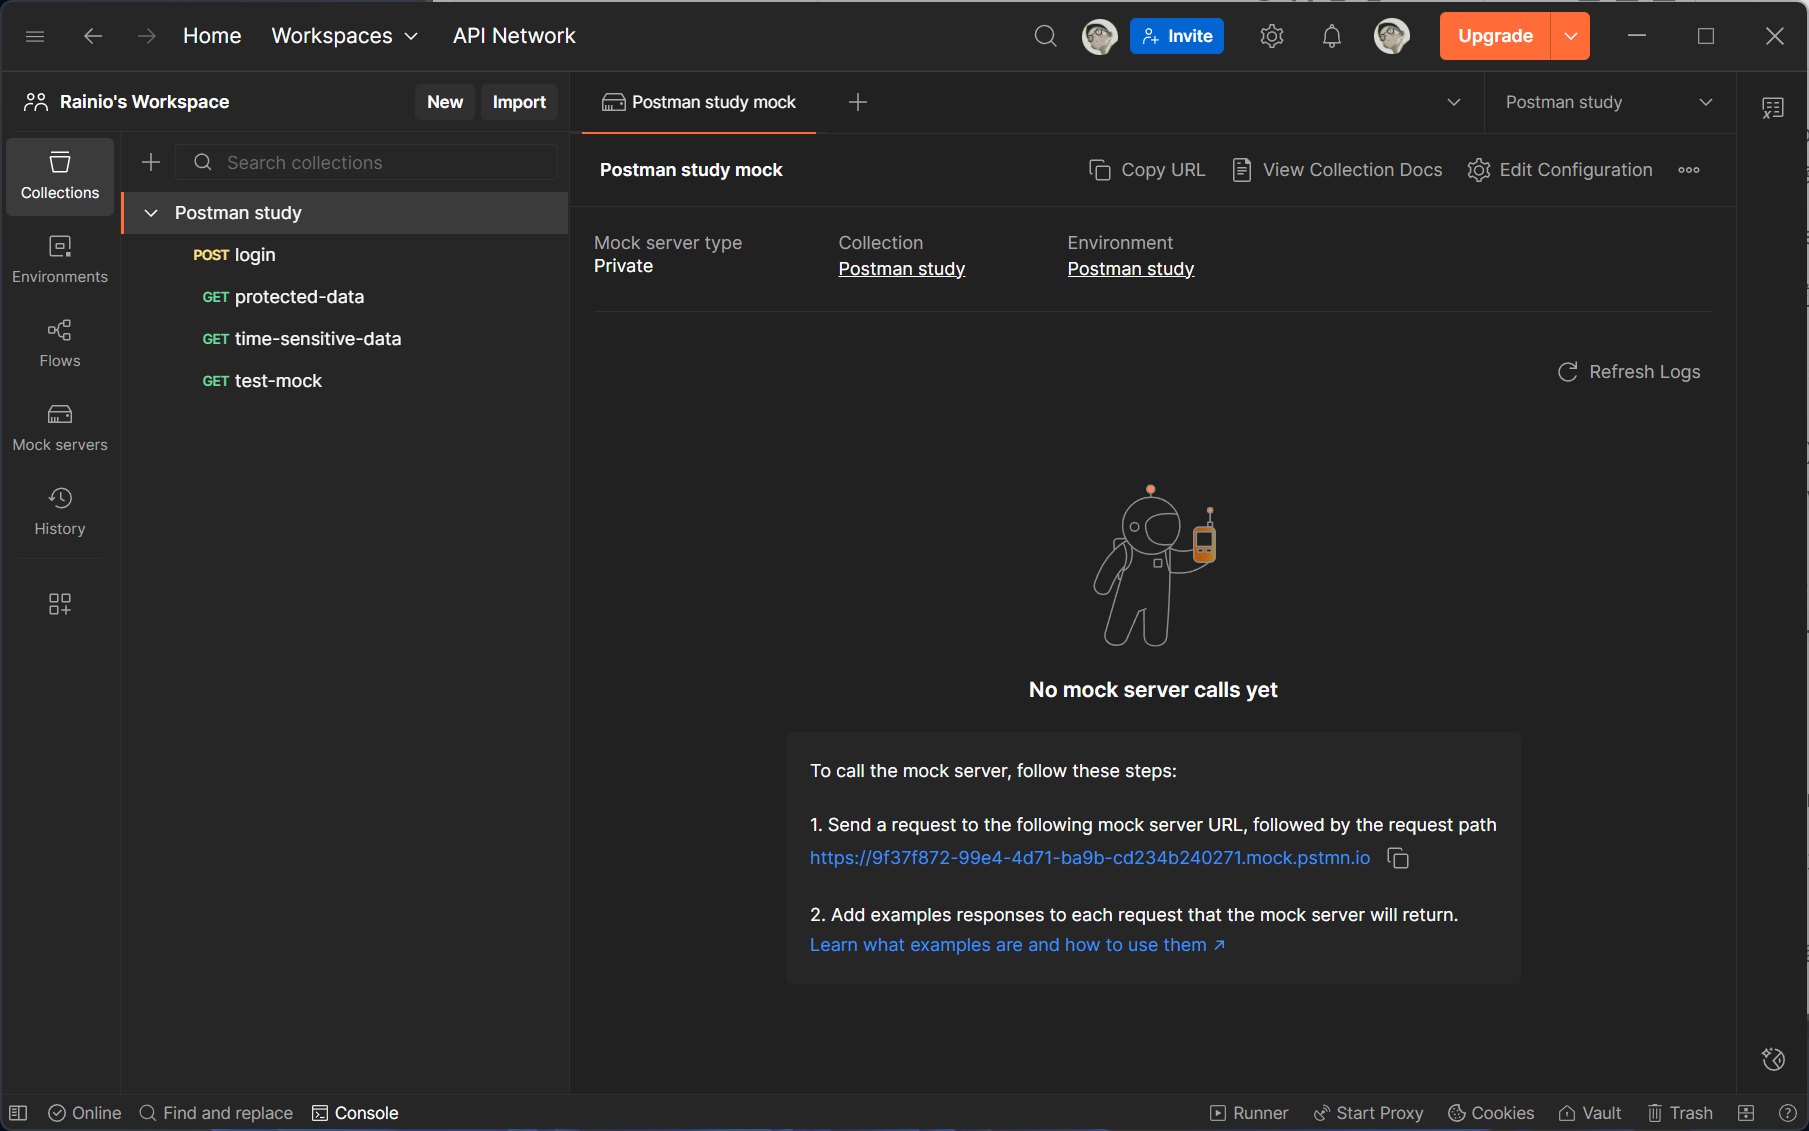
方式 2:直接创建空白 Mock 服务
- 打开 Postman 左侧导航栏,点击「Mock Servers」;
- 点击右上角「+ Create Mock Server」,后续配置步骤与 “方式 1” 的步骤 3、4 一致;
- 空白 Mock 服务创建后,需手动将接口添加到关联集合中,适合临时测试场景。
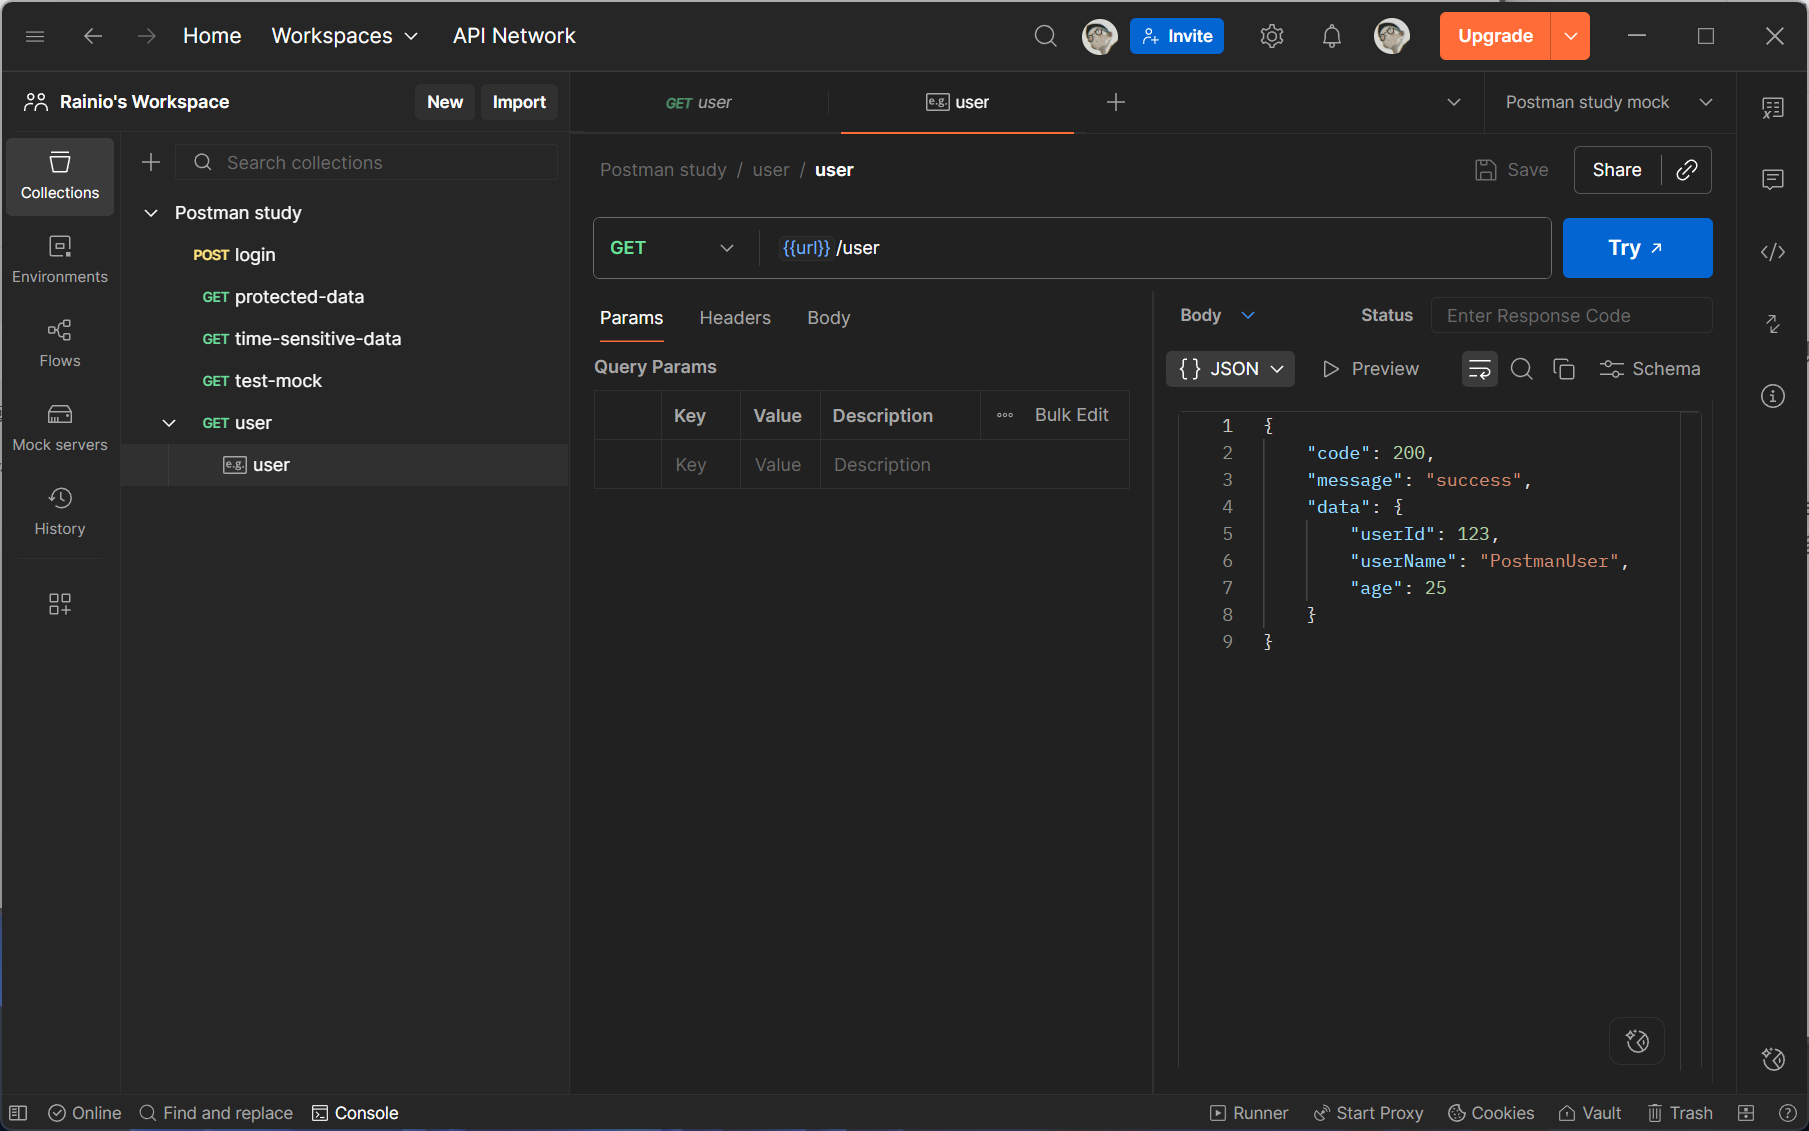
5.2 创建 Example
Example(示例)是 Mock 服务的 “响应模板”,定义了某个接口(如 GET /user)在特定条件下返回的响应数据(状态码、Headers、Body)。每个接口可创建多个 Example,以模拟不同场景(如 “查询成功”“用户不存在”)。
-
打开接口请求:在左侧集合中,找到并点击目标接口(如
GET /user),进入请求编辑页。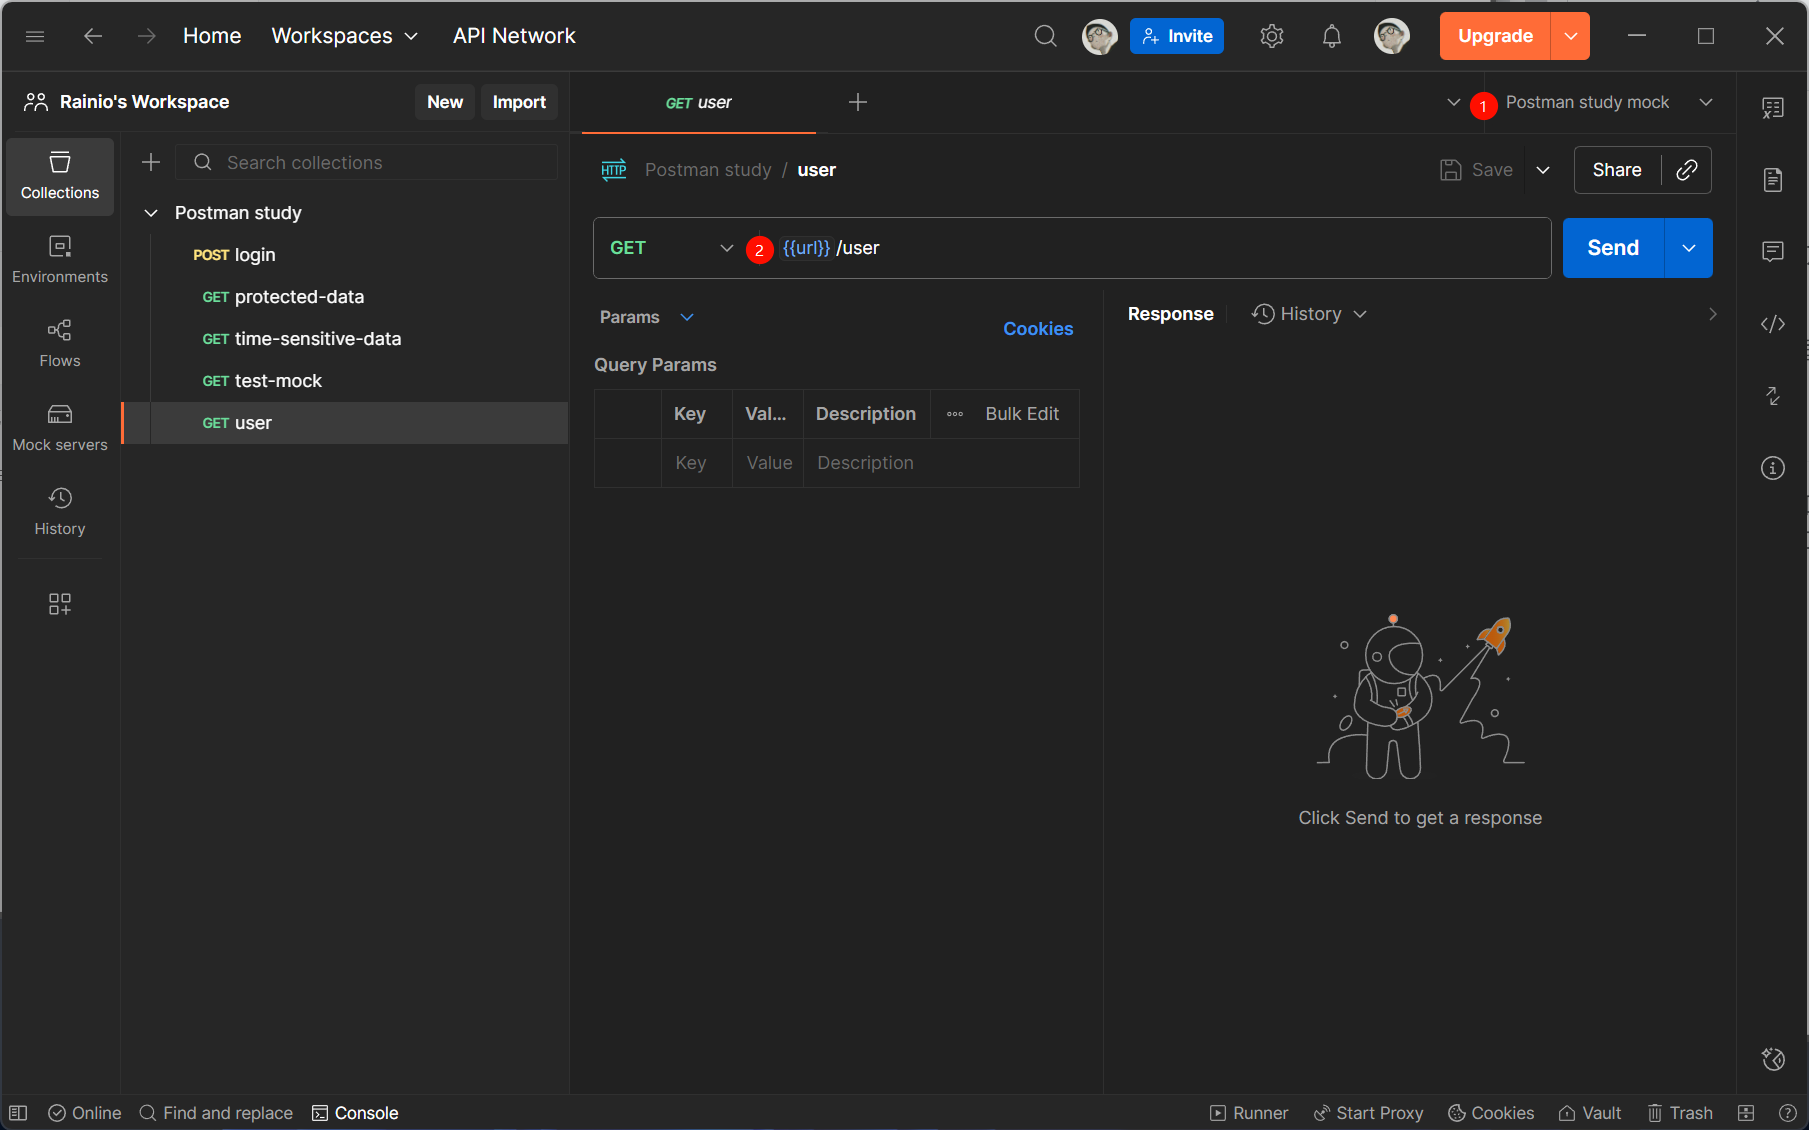
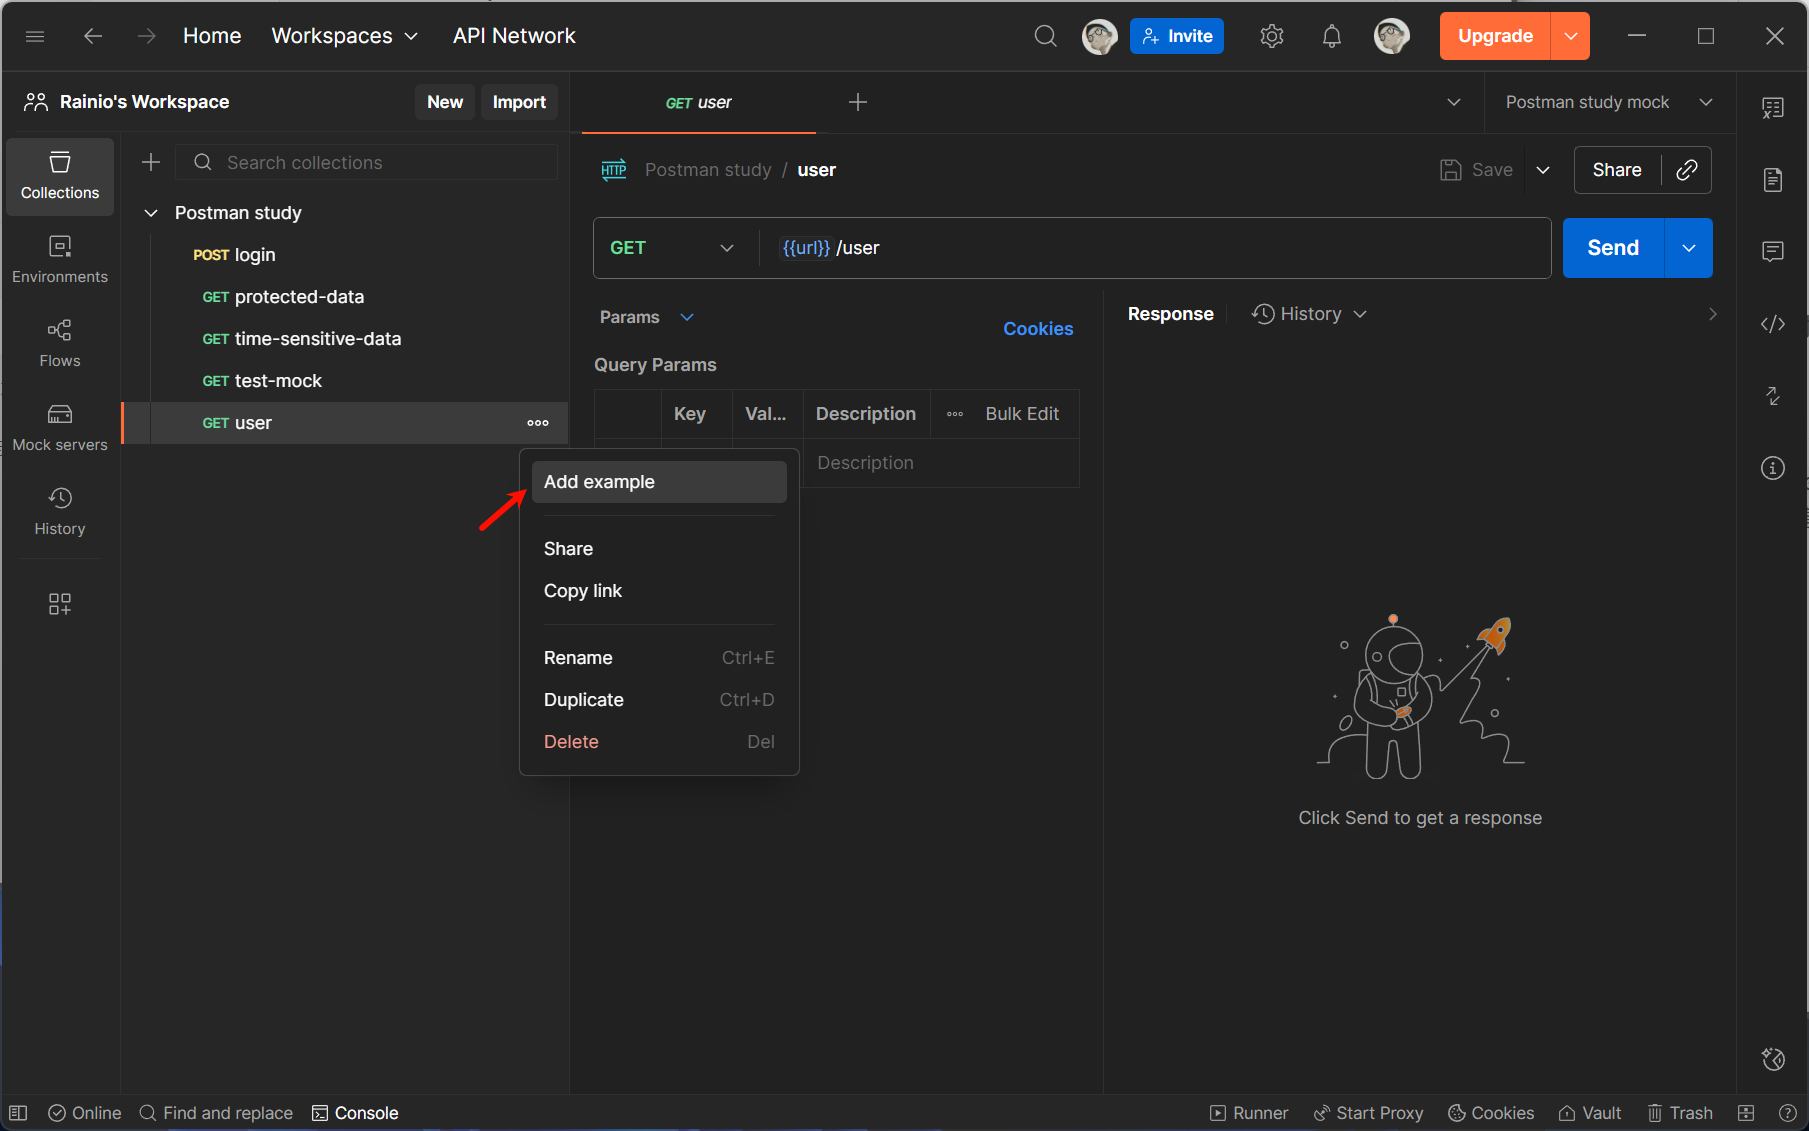
-
发起创建 Example:
- 切换到请求编辑页的「Examples」标签页,点击「+ Add Example」;
- 或在接口请求发送后(即使无真实后端,也可直接创建),点击响应区域的「Save as Example」。
-
配置 Example 基本信息:
- Example Name:输入名称(如 “用户查询成功”),明确场景;
- Request Method & URL:自动继承接口的请求方法(如 GET)和 URL(如
/user),无需修改(若需自定义,可手动编辑)。
-
配置响应内容(核心步骤):
-
Status Code:选择响应状态码(如 200 表示成功,404 表示资源不存在,500 表示服务器错误);
-
Headers(可选):添加响应头(如
Content-Type: application/json,确保前端能正确解析数据); -
Body:填写响应体内容(支持 JSON、XML、Text 等格式),示例如下(JSON 格式):
{
  "code": 200,
  "message": "success",
  "data": {
    "userId": 123,
    "userName": "PostmanUser",
    "age": 25
  }
}
-
-
保存 Example:点击「Save Example」,Example 会自动关联到当前接口和 Mock 服务中。
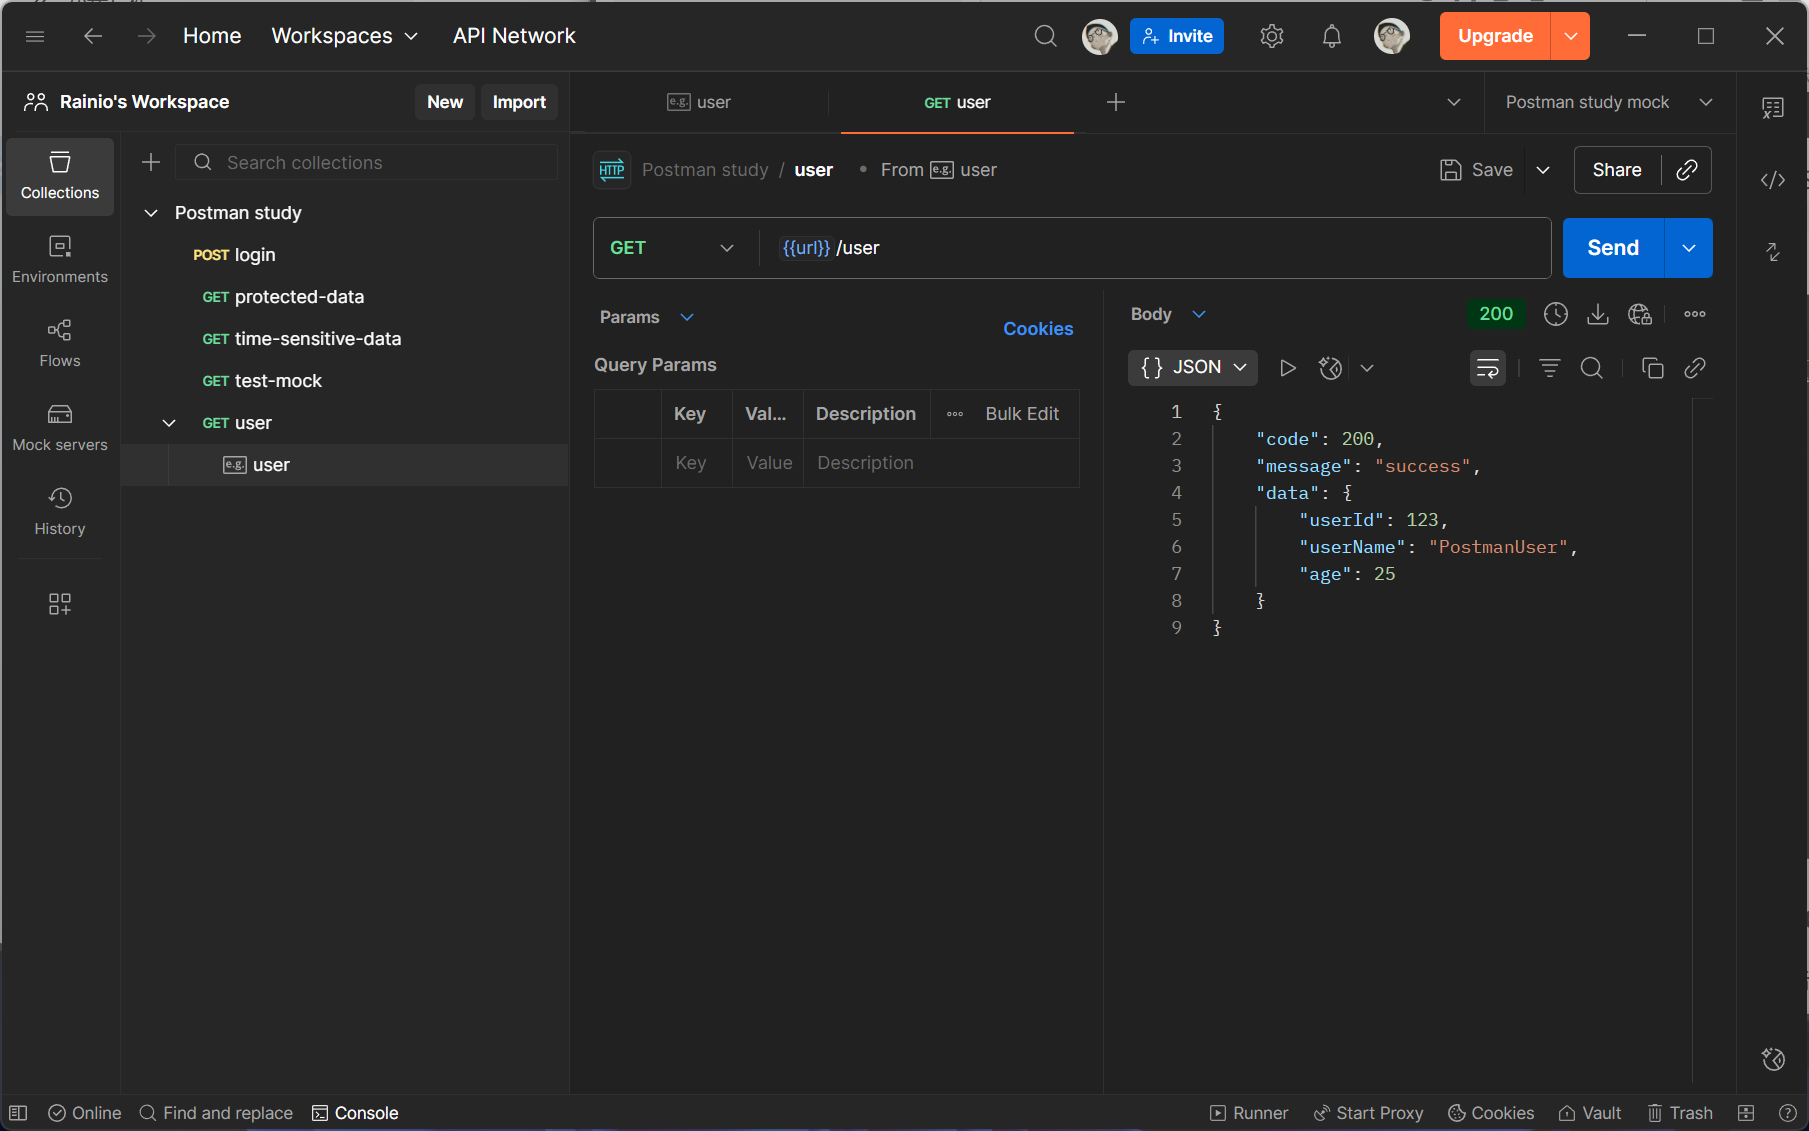
5.3 调用 Mock 服务
将 Mock 服务 URL 配置为前端项目的 API 基础地址,即可像调用真实接口一样使用 Mock 服务。
评论